I already shared a blog about how I am studying how to weave with a floor loom – and I documented the first phases of planning your weaving project and measuring your warp. Now this is the BIG one – putting a warp on a loom is a BIG process and I hope I can remember the zillions of steps.
First – let me show you something nifty. My teacher Marilyn has software that she uses to plan complicated weaving patterns. This is my pattern – not complicated, but cool to see in her software. More on that in a future blog…

Spread the Warp Across the Raddle
The first step in putting my warp on the loom was to attach something called a raddle to the front of the loom. A raddle is a stick with nails sticking up every inch or half inch. You can attach it with clamps or painter’s tape. Each bunch of threads inside those chain loops represents one inch of warp. So in this case, with a raddle that has nails every half inch, I split each little bunch between two slots on the raddle. Once it was all laid out, I could see the real future width of my project – 18 inches.

Since I’m going to manipulate my warp a lot during threading, I need to tie a piece of yarn around the raddle nails to keep the warp from popping off. Rubber bands work too, as long as they are not too old and might risk snapping.

Pulling the warp through the shafts to the back
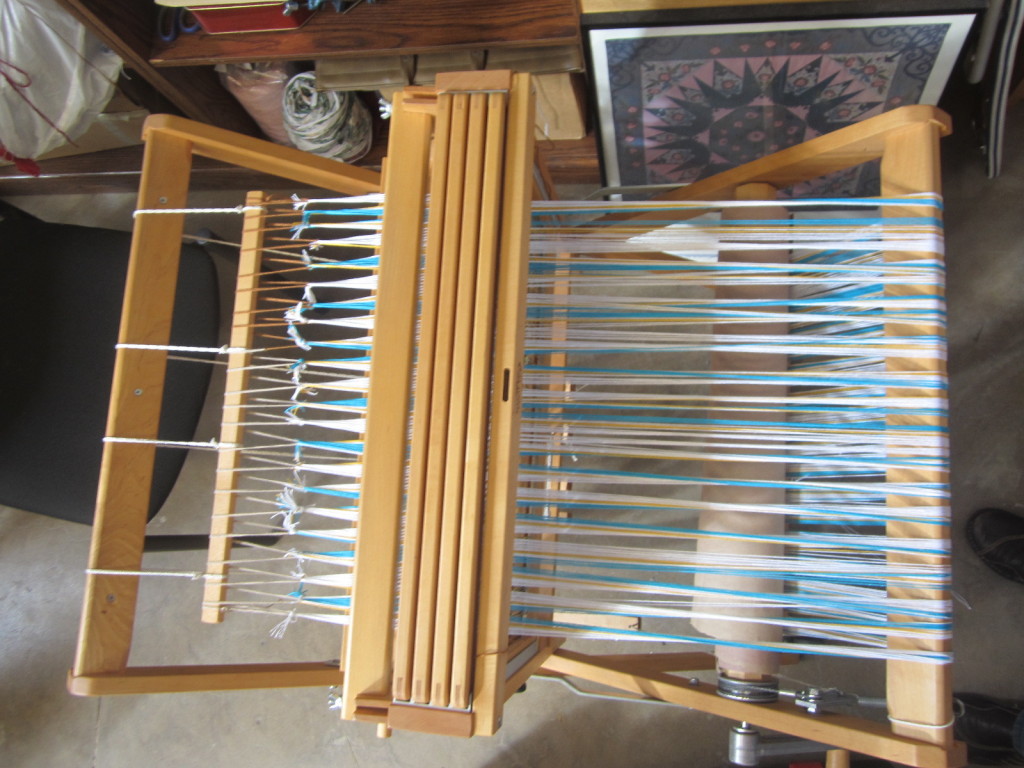
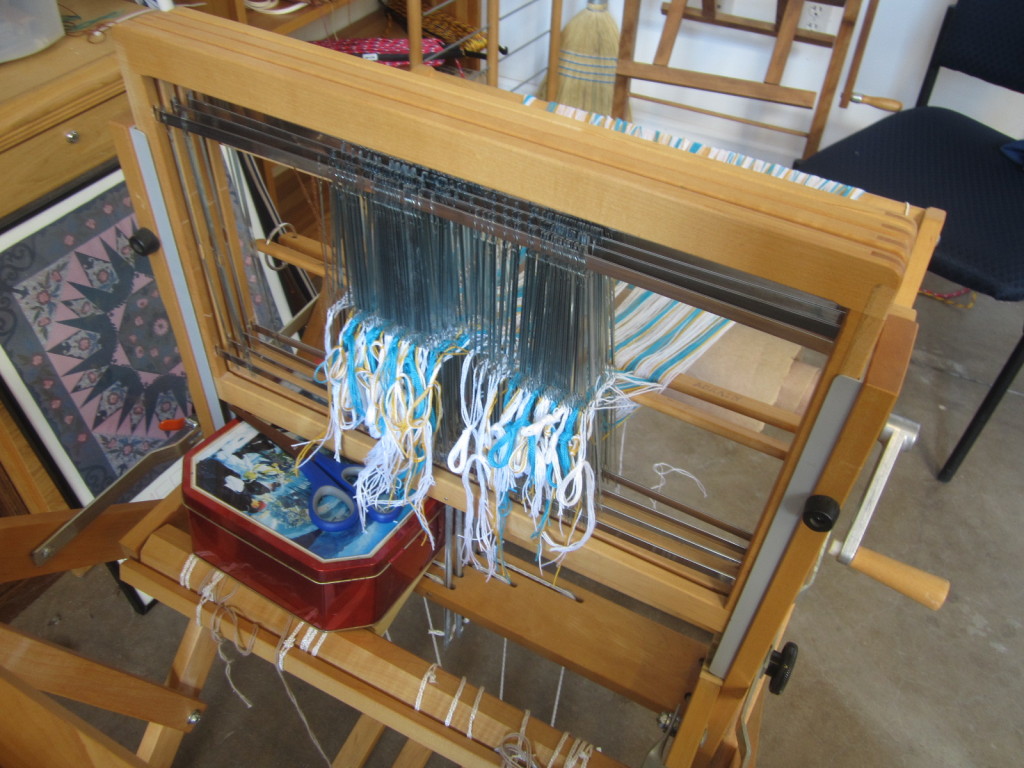
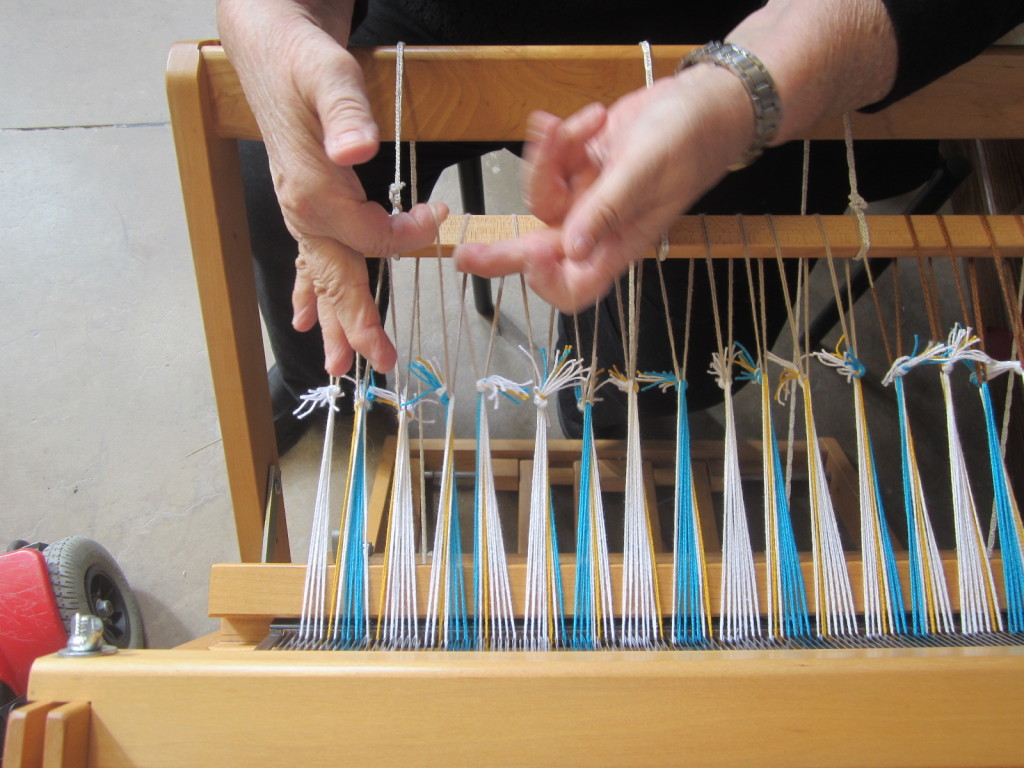
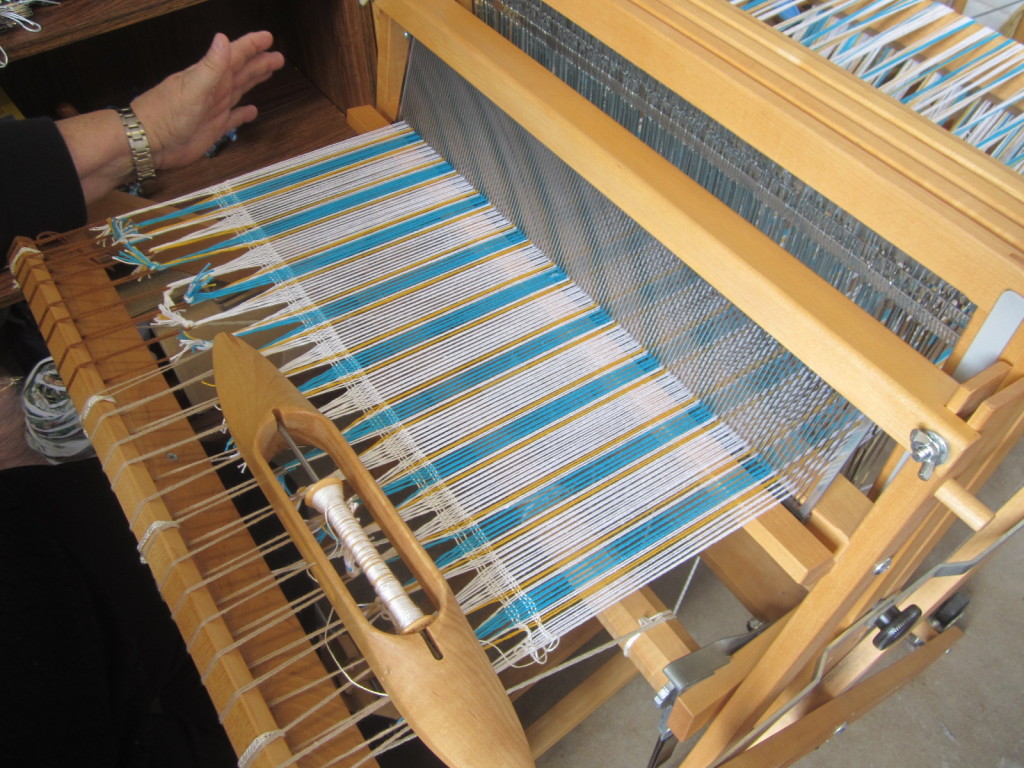
So here is a picture of a loom from above. This photo is actually from much later in the process, but it’s my best photo to show the parts of the loom.
The left hand side of this image is the “front” of the loom. The four items hanging down in the middle are the “shafts” and inside those shafts are lots of little metal pieces that are called heddles. Each heddle has a hole in the center where you thread the yarn. And over on the right hand of this image is the back of the loom. Do you see that round piece below my warp – it looks like a brown tube? That is called the warp beam.
So my next step was to pull my warp through the loom. It started in the front, where it was resting in the raddle. I pushed all the heddles to one side of the shafts and took my warp through all the shafts. Then I went over the top of that back breast beam and let the warp hang down.
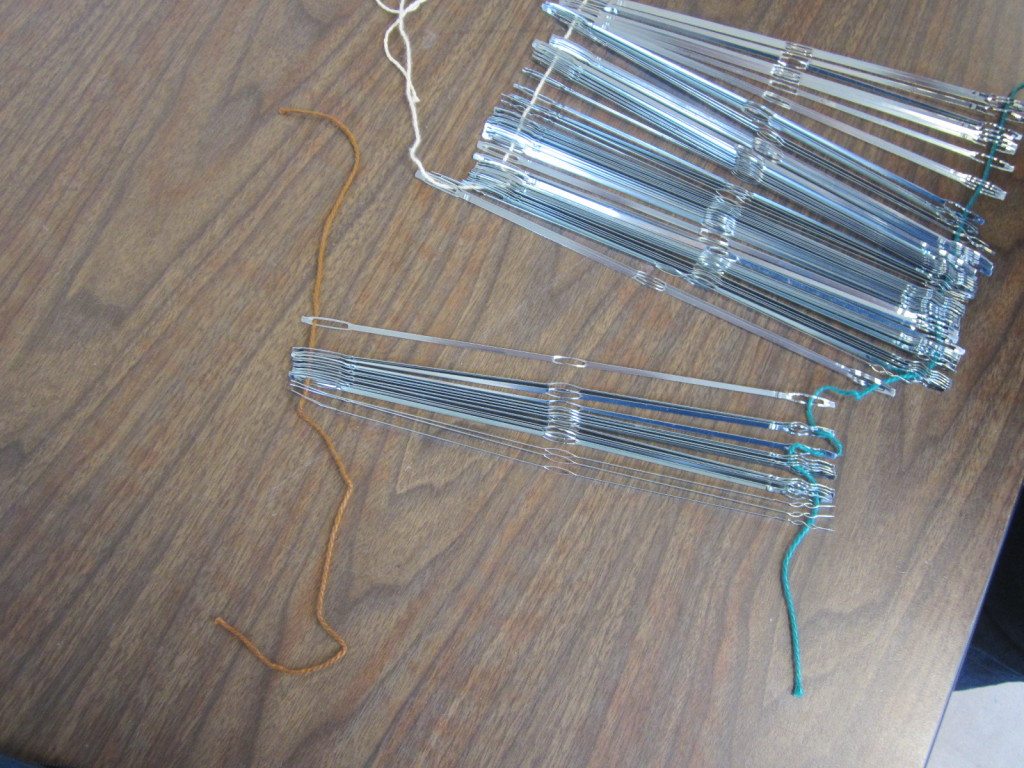
Hanging from the warp beam was a stick. The stick needs to be wider than your project, but more narrow than your loom. It was important to pull on that stick a bit to ensure it was even.
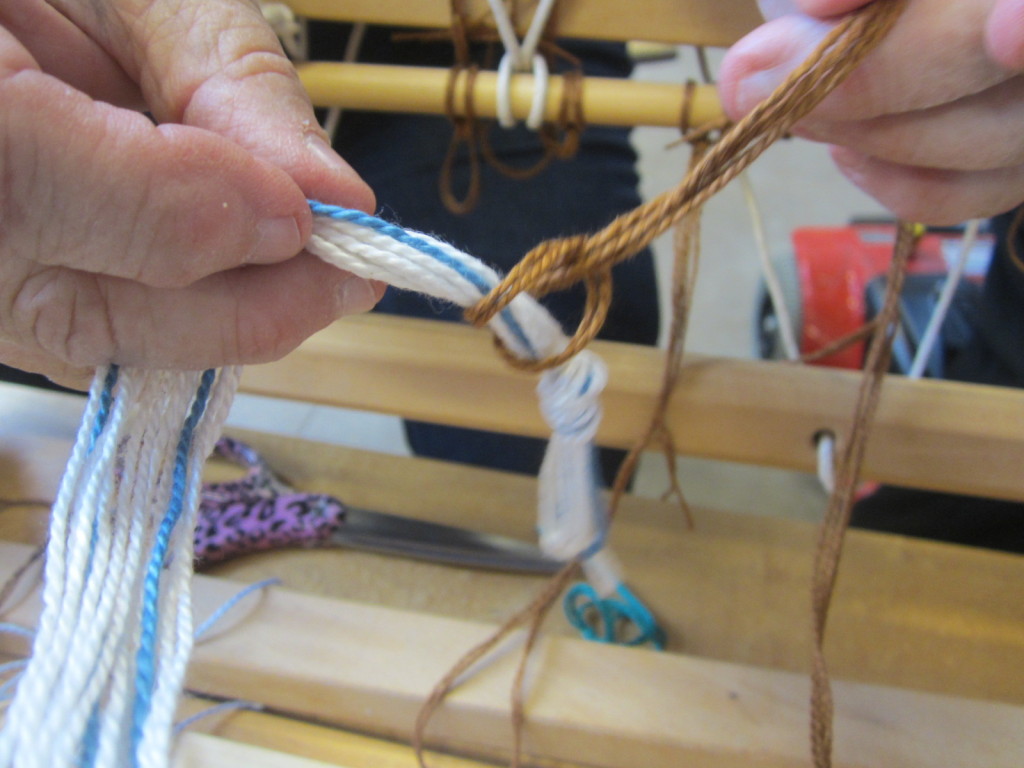
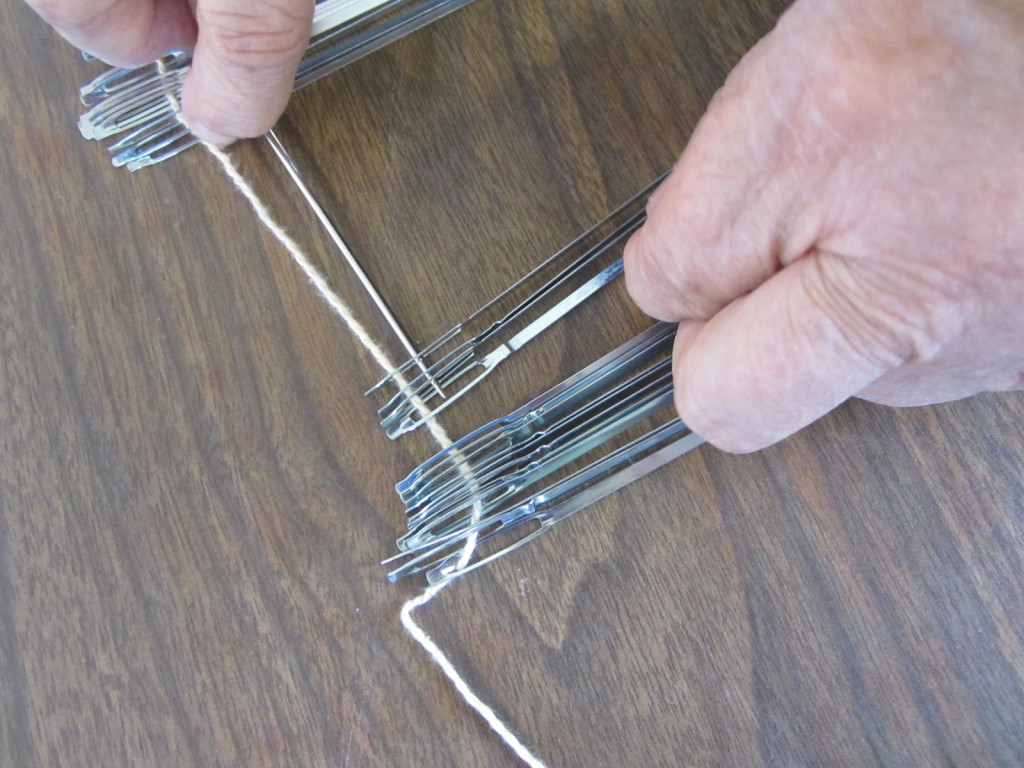
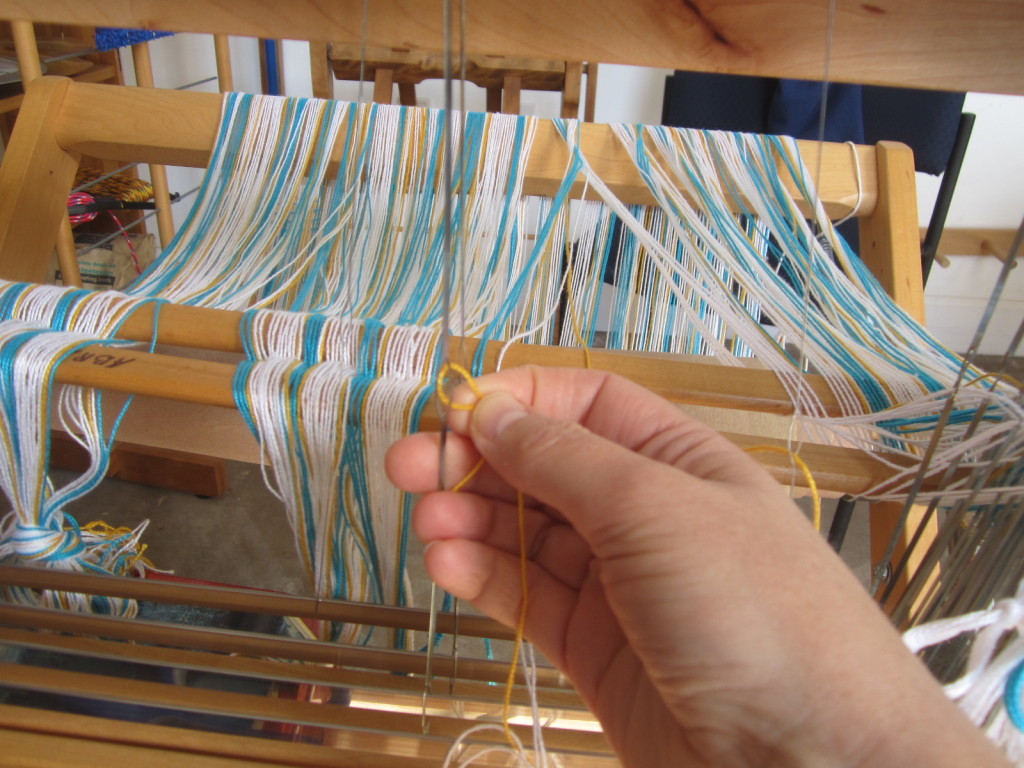
I took some brown yarn – I chose brown because there is no brown in my weaving so I would not confuse it. I measured out 18 loops of brown yarn – one for each inch of my warp. I looped the 18 loops on this stick hanging from the warp beam. I then tied a knot in the end of each inch of warp and I looped the brown yarn over the knot like this (see photo). Now my warp was securely attached to the warp beam.
Counting Heddles
At this point, I counted how many heddles were in my shafts. There needs to be one heddle for every piece of yarn in your warp. My pattern was for 288 “ends” or pieces of yarn. Since I had four shafts in my loom, that meant I needed at least 72 heddles in each shaft. Unfortunately, two of the shafts did not have enough, so I had to take a moment to add heddles.
First you need to make sure you have the right heddles. Some looms are measured in Imperial and some in metric, so this can be trickier than you think. They may look like they are the right size, but you need to be careful. The heddles need to slide very easily back and forth in the shafts or it will make weaving quite annoying.
Heddles are wiggly slippery things, so you usually store them by putting a string through the top and bottom holes to keep them aligned. In this case, I needed to take some heddles away from the full bunch, so my teacher Marilyn used a tapestry needle and threaded a bunch of heddles on to a new string – on the top and bottom. Then I could carry the heddles to the loom.
On the loom I was using, I could sort of pop off the metal piece in the shaft where you thread the heddles. It was not easy, but I very carefully threaded the heddles on the top bar first, and then the bottom bar. It was easier on the shafts near the edges. To add heddles to the inner shaft, I propped them up with a phone book or two so I could see what I was doing.
Winding the Warp on to the Warp Beam
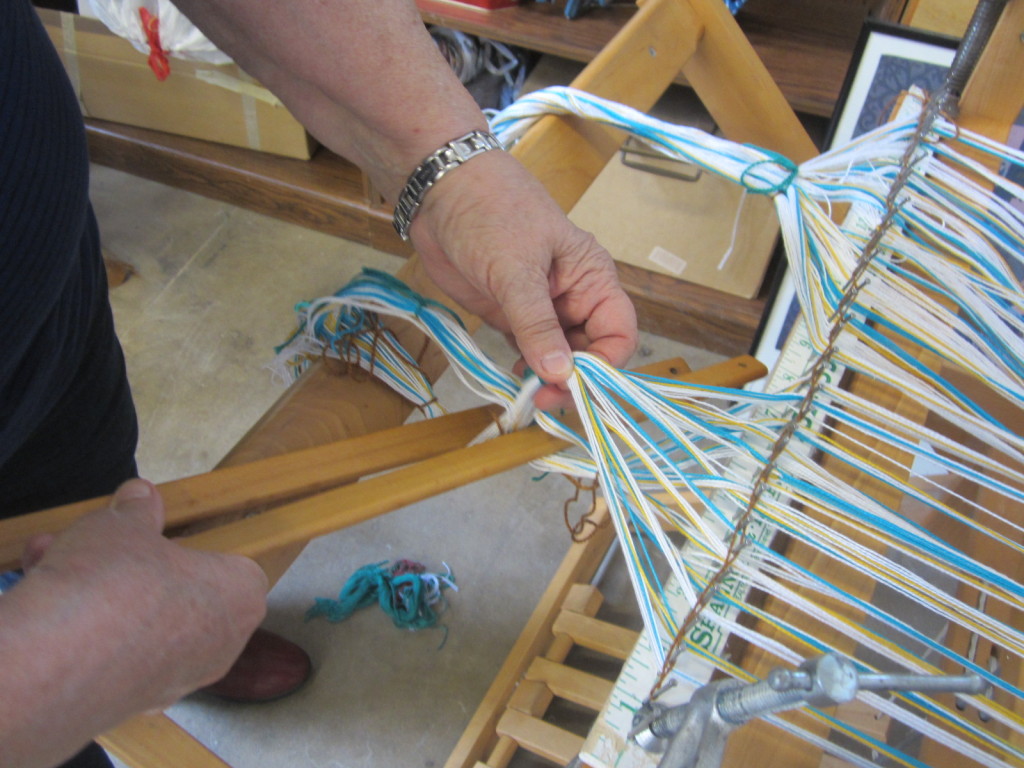
Now, it was now time to press down on the warp to make sure it was even. Marilyn cautioned me not to comb my fingers through the warp, like you might comb out tangles in hair. This is because you can pull on individual pieces of yarn and get them even more tangled. Instead, she stuck her fingers in the warp and pushed down with her upper body to straighten out the warp.

You can see the raddle is still in place at this point, ensuring your warp is spread out across the right amount of space.
Now it was time to crank the warp on to the warp beam. The warp beam usually has a handle on it, and a brake. As I turned the handle, the warp slowly wound around the warp beam. I put in pieces of brown paper as I rolled it on, to keep the fibers of the warp from blending and tangling. There will be a lot of tension on the warp, so you want to ensure it is always straight and clean. As we turned the warp on to the warp beam, we would stop and do this same motion where we put our weight on the warp to straighten it.
As you turn the crank, you have to keep your foot on the brake. This releases the break (contradictory to a brake in a car) and allows the warp beam to turn. When you lift your foot, the brake stops the warp beam from turning and especially from unrolling all the work you have done.
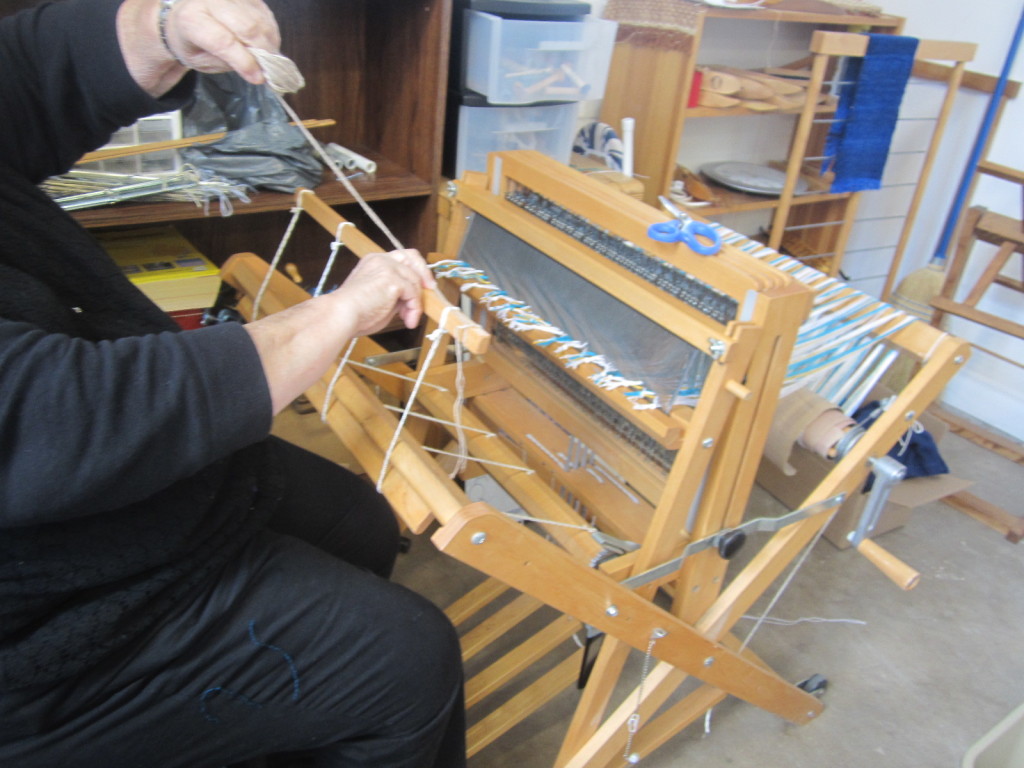
Adding the Lease Sticks
At this point, you remove the raddle. You need the raddle out of the way for this next part.
After you have turned a lot of warp on to the warp beam, you will come to the part of your warp that is called the “cross.” The cross is absolutely critical to retain as you put the warp on the loom. When measuring the warp, we tied the cross with different colors of yarn so that we could find it again. At this point, we have to untie that yarn, so to retain the cross, we put in “lease sticks.” Lease sticks are two sticks with holes in the ends of them, that are just a bit wider than your finished project. In the holes of the lease sticks are round clips, like binder clips, or you can also tape them with painters tape. You slip the lease sticks into the cross before untying your special bits of yarn:
After you get the lease sticks in place, you can pull them all the way through the shafts to the back side of the loom. You then hang the lease sticks from the piece of wood behind the shafts from two loops of yarn, so it hangs down.
Finally, you keep turning the crank on the warp beam until most of the warp is on the warp beam – and just about 2-3 feet was still hanging out through the shafts and towards the front of the loom.
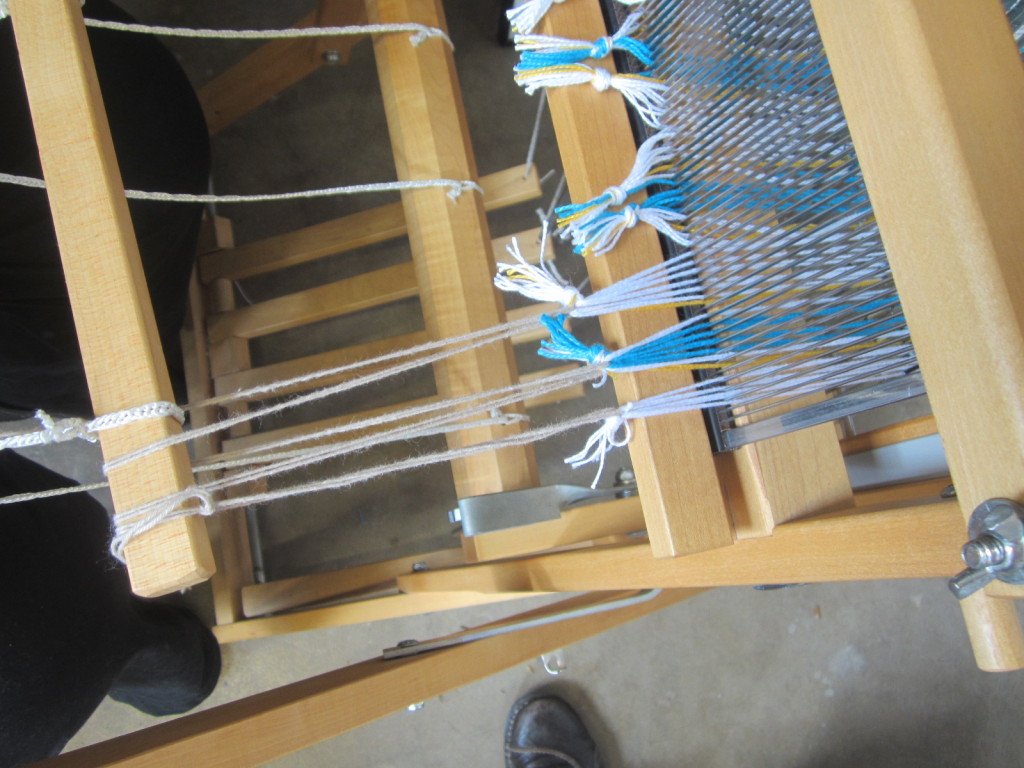
Threading the Heddles
Take a look at this photo – it shows the view when you are sitting at the front of the loom, looking at the shafts in the middle of the loom. You can see the two lease sticks hanging down behind the shafts – it’s the sticks with the round metal loop connecting them.
I pushed all the heddles to the left of the shafts, what Marilyn called your “storage.” And I tied off the warp into clumps just to ensure it didn’t fall out the back.
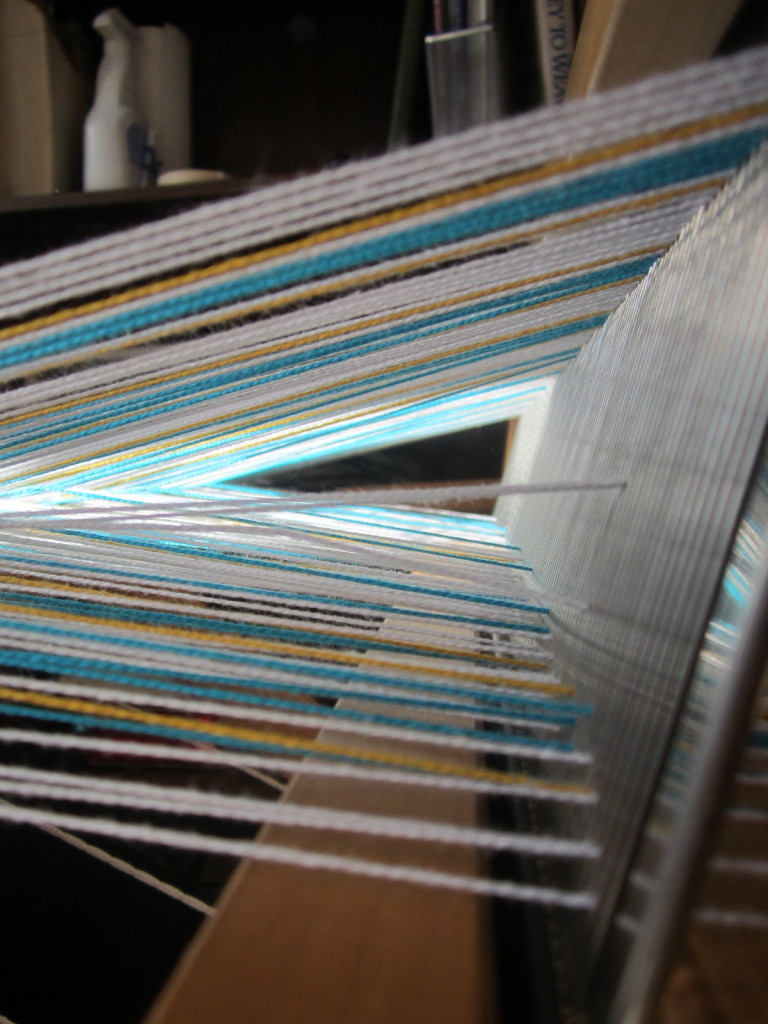
Next I started to thread the heddles, one by one. Here’s a photo of the shafts with some heddles threaded. You can see I’m threading from right to left. I thread the colors in the order of the pattern. Amazingly, even though the warp has been through so much already, most of the individual pieces of yarn are still in the right order! Occasionally, some were flipped, but I can easily put them in the right order now.
Here’s how you thread a heddle. First, you slide over one heddle from each shaft, so you have four heddles ready to thread. It’s important to thread in the right order. I was going to weave using “plain weave” which is the most basic weaving type. To thread for plain weave, I thread the shafts in the order of 1-2-3-4.
So first I get the heddle on the shaft closest to me, which is shaft #1. I take the next thread and I bend it in a loop. This makes it easier to see as I’m threading it, and less likely for the ends of the yarn to shred as it goes through the eye of the heddle.
Did I mention that my project had 288 ends, or 288 pieces of yarn to thread? It took me four hours to thread the heddles. It sounds tedious, but I loved every minute. I was the only one in the fiber classroom, the sun was shining in, and I could hear the burble of the artists who work at the Workhouse Arts Center as they conferred on the projects. The more time I spend in the fiber art classroom, the more I love the artists in that building. I love how they collaborate and problem solve together. I love how they build each other up. I love how they talk to the people who are touring the facility, especially the children and the mentally challenged adults. They show such authentic delight in meeting the artists.
Here’s what the classroom looked like, the day I was threading my heddles. This place used to be a prison, and this area was cells or workrooms. The walls are scarred by how many sad memories? For me, it is only peaceful memories.

As I was threading, it was important to check my work each time. After threading the four heddles across the four shafts (or 8 in the case of this photo), Marilyn told me to check that I had threaded them in order. I started to notice that if I held all four strings like this, it would make this very cool geometric shape, even more beautiful from the way the sun shone through the heddles.

I encountered two problems while threading. At one point, there were some extra threads – two extra white threads. Who knows why? I was perhaps day dreaming for a moment when measuring my warp. Marilyn told me to just toss them back behind the loom and pull them out later.
Another time, I had two heddles that were crossed. Marilyn said to just push them to the right and not use them. Just use the next clear heddle.
After I finished threading four heddles, I would tie an overhand knot to keep the threads from unthreading.
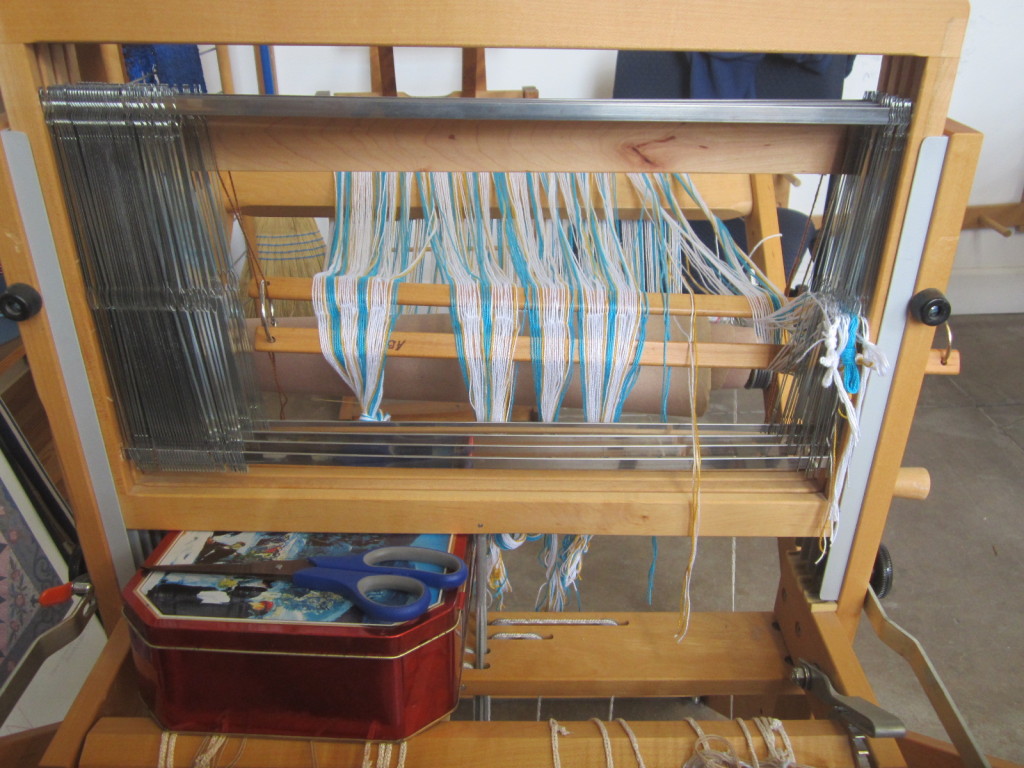
When it was all threaded, this is how the loom looked – a bunch of knots peeking out from the heddles. You can see I boosted up the shafts using a tin box so it would be easier on my back, and it provided a shelf for my scissors.
Once all the heddles were threaded, I removed the lease sticks. Through some magic, the cross is now in the loom. Honestly, my brain does not understand it, but it works!
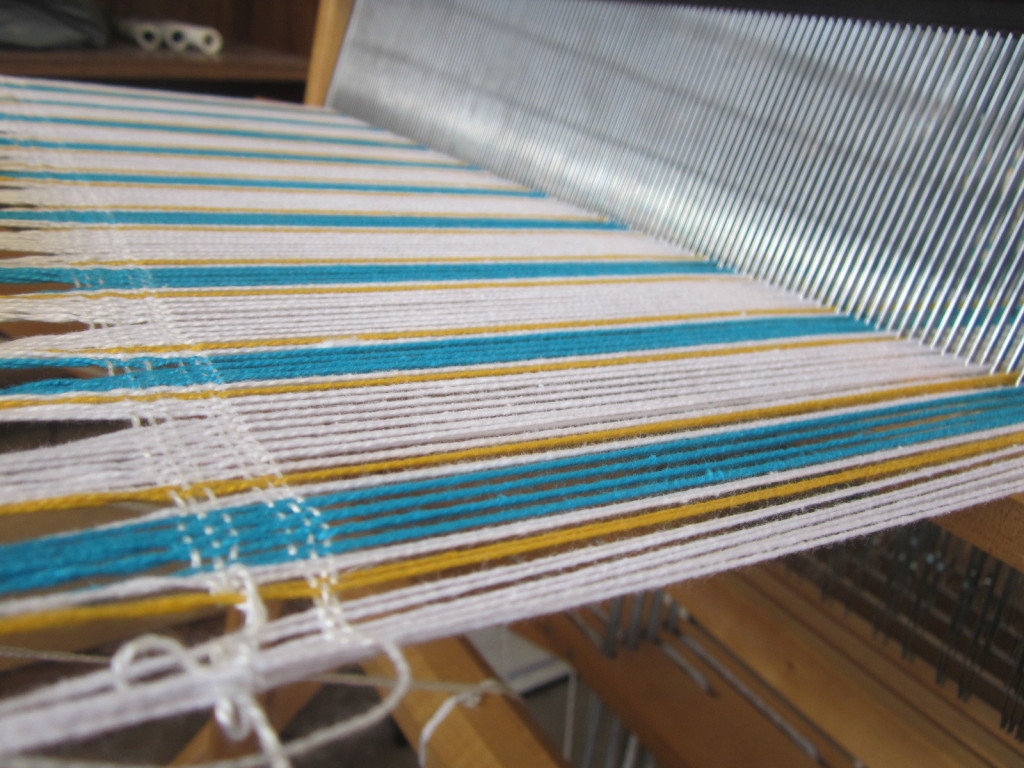
Threading the Reed
I had so much fun threading the heddles. Guess what? I get to thread more stuff!
The beater is that classic part of the loom that most people recognize. Imagine the times you have seen someone weaving, and they throw the shuttle and then they pull back on this piece of wood and “beat” on the woven part to get it to even out? That’s the beater.
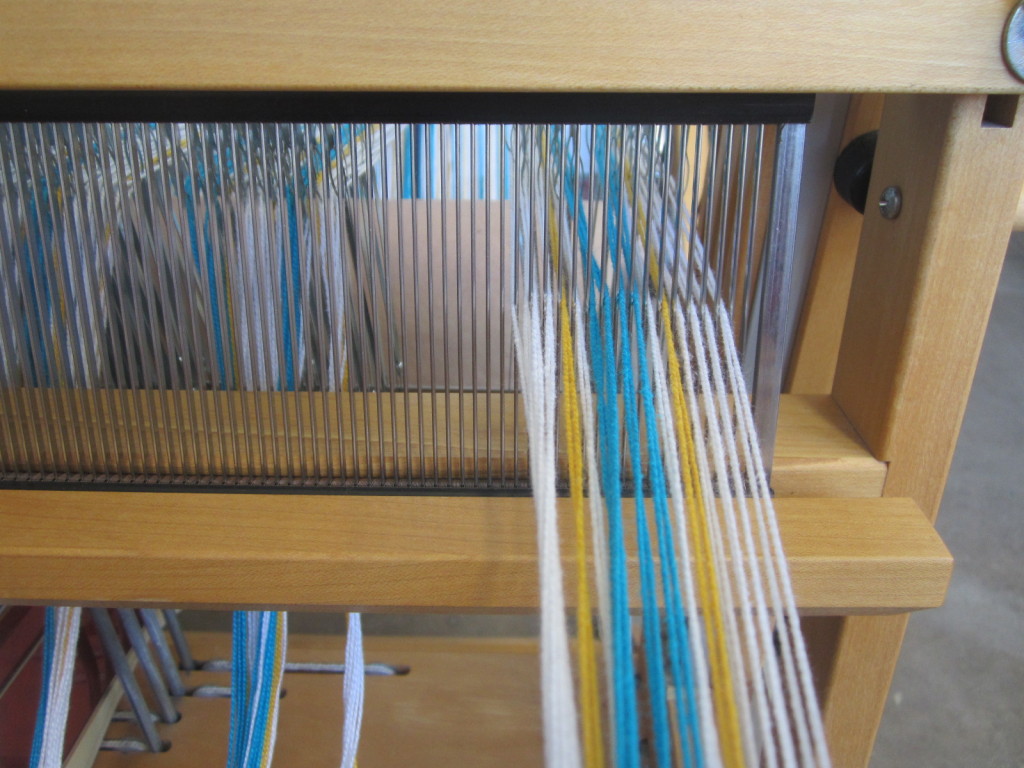
I had to determine what size of reed to put in the beater. When planning my project, I had worked with Marilyn to figure out that my yarn weight would work best if I wove 16 ends to the inch. The reed is the piece of metal inside the beater. It comes in different sizes – depending how much space there is between the vertical pieces. These spaces are called “dents.” Reeds typically come in these sizes – 6, 8, 10, 12, 15, 20. Notice – not 16. So next I looked at a “reed chart” to determine how I would thread the reed depending on size of reed. Luckily, there was a size 8 reed, so that made things super easy.
I put the reed in the beater, ensure it was centered and the project was centered.
I stepped on the brake and pulled enough warp towards me so it touched the breast beam.
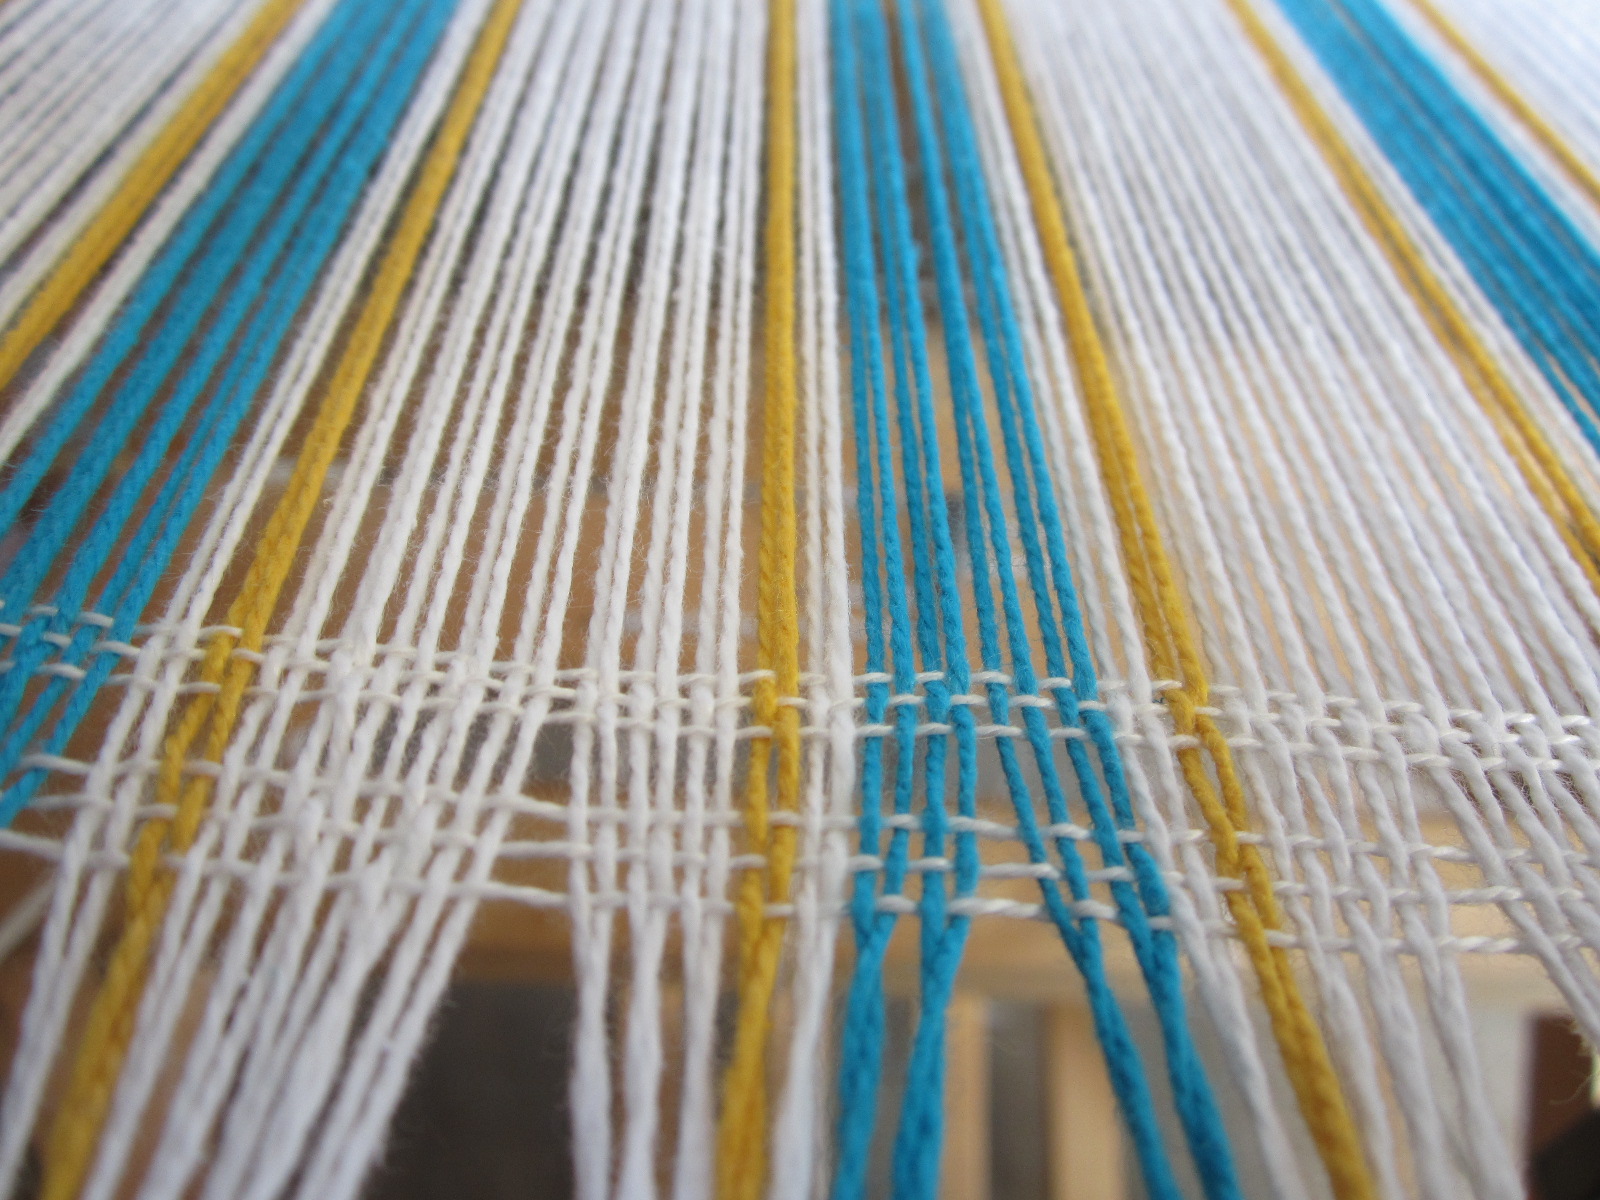
I put two threads inside each dent, to get 16 ends to the inch.
Threading the reed went much faster than threading the heddles. I could do two at a time, and also I knew all the threads were in the right order in the heddles, so I didn’t have to think about that part. I did it in about one hour.
To thread the reed, Marilyn taught me that it is helpful to pull out the threads and lay them in order between your fingers – in the “finger gaps” we called them.

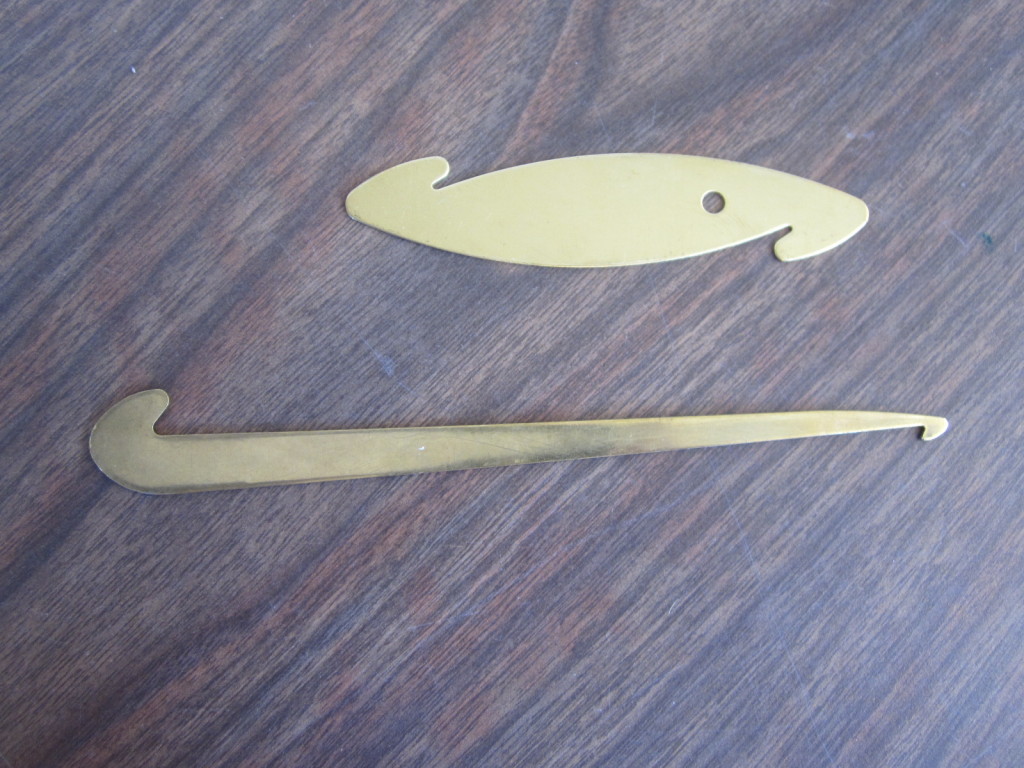
Then you use a tool called a reed hook to pull the threads through reed. You stick the reed hook through the reed from the front, hook around the threads and pull them through. After you pull a bunch through, you tie an overhand knot – again to keep the threads from unthreading themselves.
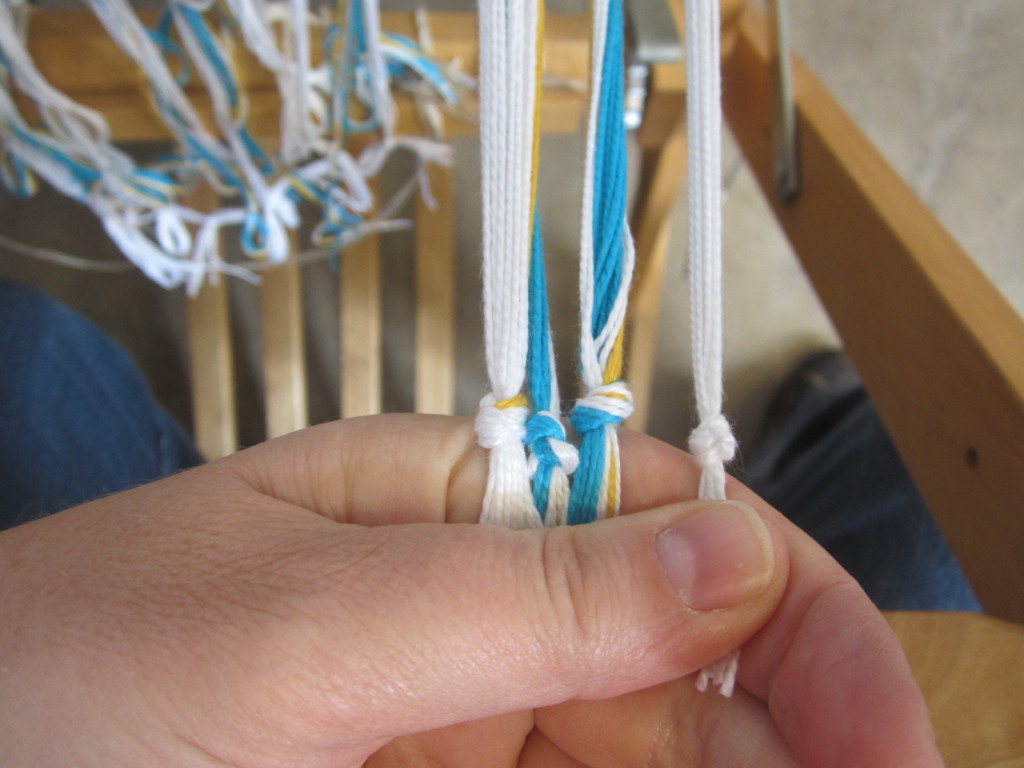
Attaching the Warp to the Front Beam
It’s now time to tie knots in this end of the warp so you can attach it to the front beam.
The first clump on the right was supposed to represent 1/2 inch of warp, or about 8 pieces of yarn in this project. All the middle ones were double that (or one inch of warp), and the last one was also supposed to be 1/2 inch. The edges are smaller because the edges are most likely to be loose, and it’s really important they have good tension, or the edges of your project might be ugly.
I used the scissors to even them off. I tied a permanent knot in the bottom. I tried to make the knots perfect as even as I could:
Once all the knots looked even, we reached down to the front beam to find the apron stick. The apron stick is like that stick in the back beam – it needs to be wider than your project and narrower than the loom. It needs to hang evenly. In this case, it was attached to the front beam by those four white threads. We had to adjust the threads to ensure it was even. On my loom at home, I have a huge piece of canvas attached to my apron stick to keep it even.
Next we attached a long piece of yarn to the apron stick. We were going to use this piece of yarn to tie the knots to the apron stick.
You take that long piece of yarn and you thread it through the first knot, from the bottom of the knot upwards. You try to get the knot right in the middle. You pull the yarn back towards the apron stick and go under the stick. It is very important to be consistent – to go from under the knot and from under the stick. This makes it much easier to adjust it later. You ensure there is about six inches between the knot and the apron stick so you have some wiggle room later when adjusting the tension.
Once the warp pieces are all “sewn” on to the apron stick, it looks like this. Your warp is now secured at the front and the back of the loom!
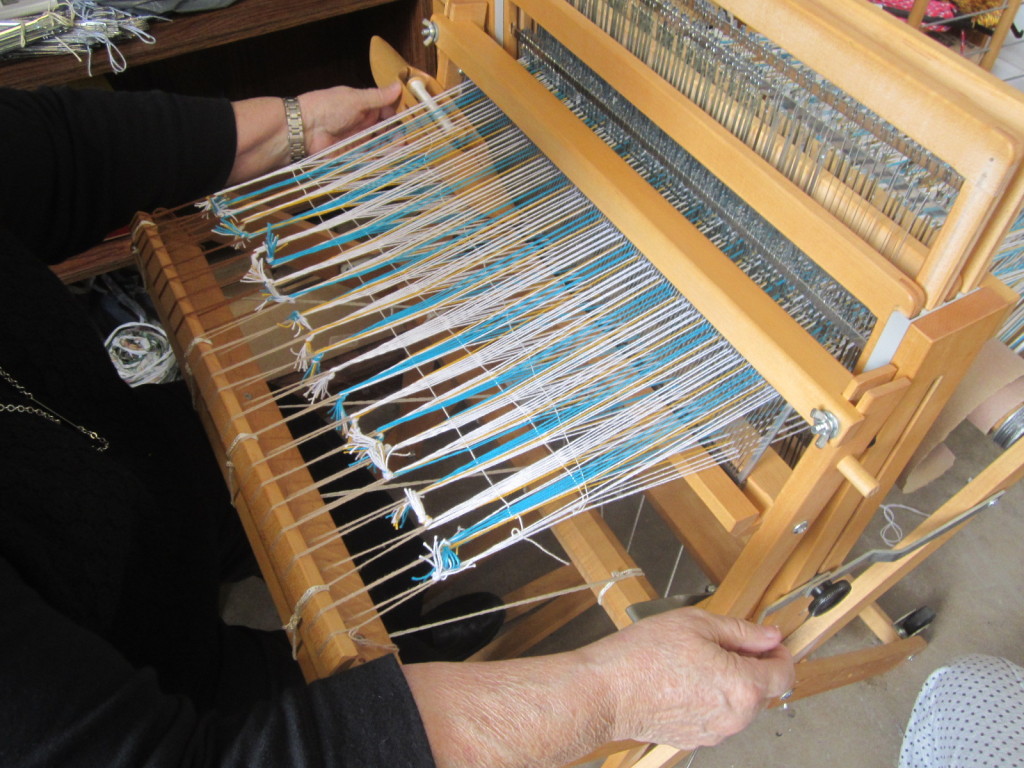
Next Marilyn pulled out a long stick and started to beat my warp! My precious warp! But she was just checking the tension to ensure it was even all the way across.
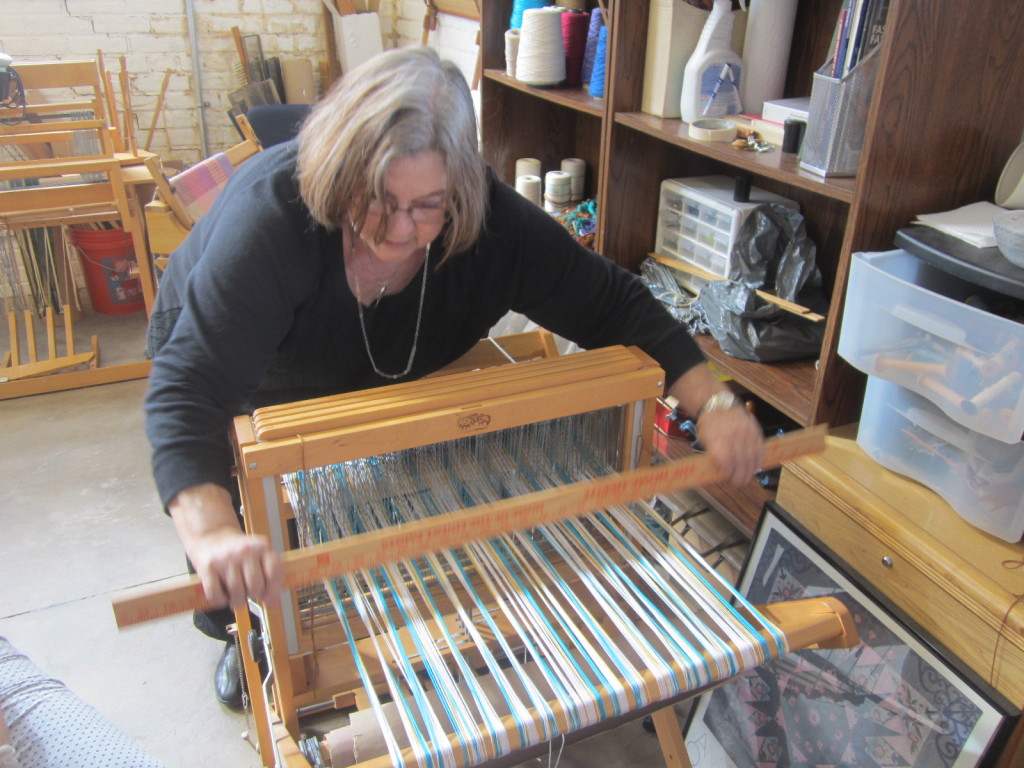
It was not even, which is normal. We had to pull on the threads attached to the apron stick until the warp had a perfect tension across the full width.
We pulled on those threads to move the slack back and forth across the width until the whole thing felt equally tight. It might mean the knots are not perfectly aligned anymore. That is okay – you check the tension by feeling with your hands, not looking with your eyes. If the knot gets pulled all the way to the apron stick, that’s not great. It means you have no more wiggle room. That’s why we left six inches space at the start.
Checking Your Heddle Threading
Now even if you have done a super careful job threading your heddles, it is possible that some threads have become entwined. It looked clear when threading the heddles, but the tangle happened further back in the loom. The way you test for that is to step on some loom pedals to see if your shed is clear. The shed is the triangle shaped space that is created when you press on the pedals, where you throw the shuttle later.
Here’s what my shed looked like the first time I stepped on the pedals:
I mean – isn’t that beautiful? Even though I had a few threads that I needed to fix, look at how the sun was shining on the threads in the back! Look at all those threads making this glorious space! That metal stuff on the right is the reed. And isn’t it wonderful how close I am to weaving?
So next I lifted my feet from pedals and determined which threads were tangled. I took those threads back out of the reed, out of the heddles and traced their route back into the warp. I untangled them, rethreaded them, tied the knot again, adjusted the tension again, and stepped on the pedals again. The second time, there were a few more threads out of order. Marilyn said this is normal. And the fact that I only had to do it twice with 288 threads was great.
Weaving Some Weft
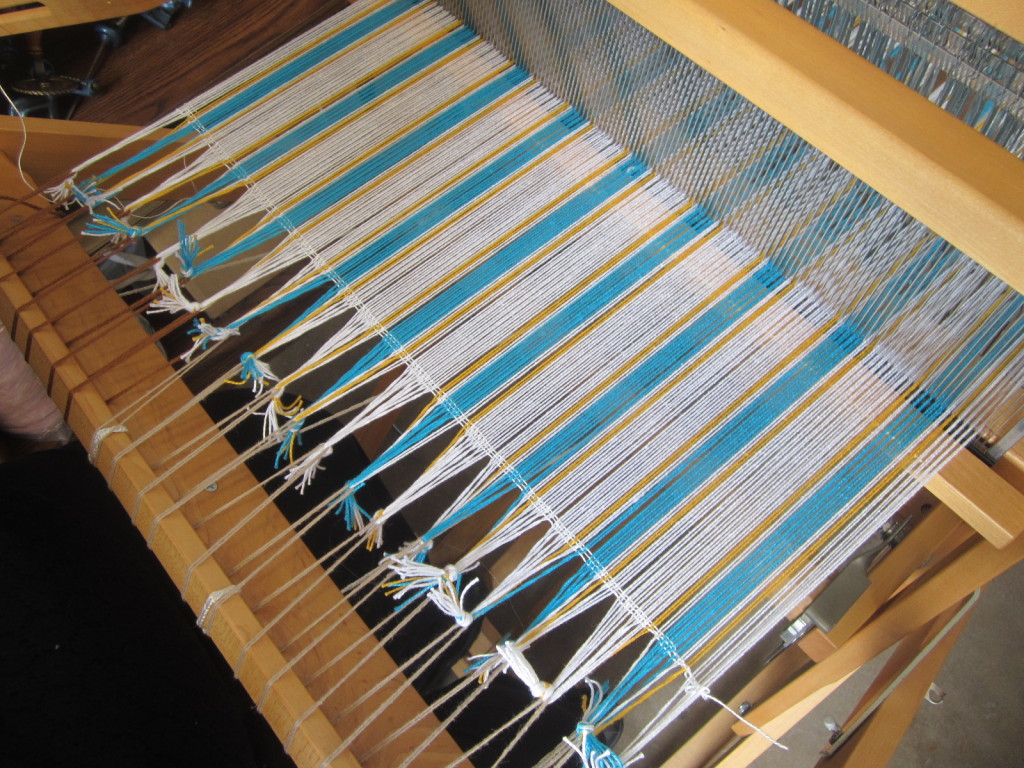
Now it was time to throw the shuttle back and forth a few times to create a baseline for the weft. You can see that my warp has deep jagged triangles coming out from the apron stick toward the reed, and we need those threads to be even, not slightly diagonal. So we threw the shuttle back and forth three times WITHOUT beating the result. Then we beat it with the beater.
This is how my warp looked after those first three threads of weft. Can you see how that pushed the triangles away from the reed, making an even warp?
We did it again – threw the shuttle back and forth three times without beating, and then beat it.
Now my warp was perfectly even and I was ready to start weaving!!! Finally!!! Did you ever imagine that it took so much time to create a warp, and that the actual act of weaving is the tip of the iceberg for this project?
At this point, I took some time to just admire my warp in the sunlight and marvel at how lucky I am to have this teacher, the time, a healthy body for this physical work, and a heart that loves making things.