
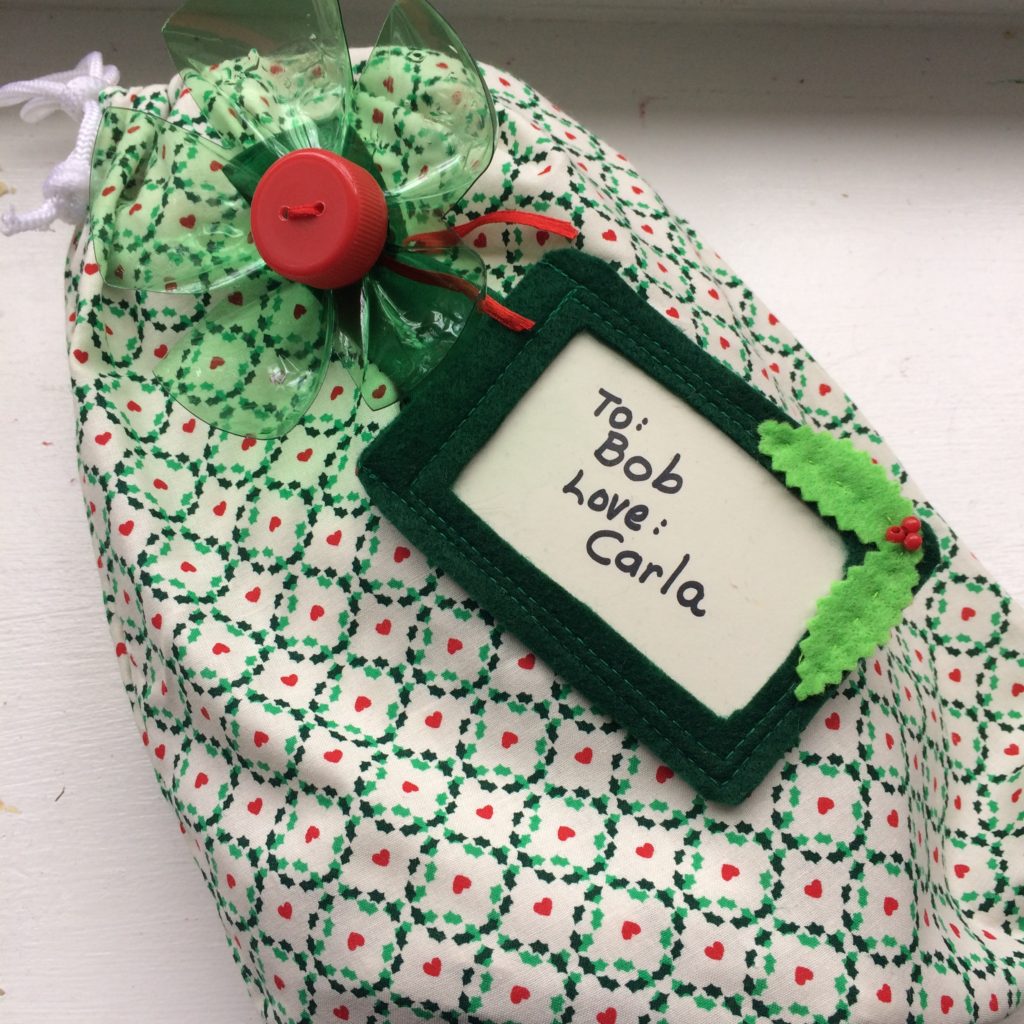
Usually my family makes holiday gift tags from reused holiday cards, but for a fancy option, I designed a reusable fabric tag inspired by a luggage tag. I also designed a fun gift “bow” from a plastic bottle and cap. We also wrap gifts in fabric gift bags.
Usually we staple the paper gift tags to the fabric bags, but I wanted something that looked more finished. I could have made a loop to hang the tag around the drawstring cord, but I wanted something that would place the tag in the middle of the gift. I decided to try a button hole and sew buttons on my fabric gift bags. This was my first time making a button hole on my sewing machine! The button also provided a secure place to tie my “bow.”
Reusable Gift Tag Supplies
- Craft felt approximately 3 inches by 9 inches – I get my felt secondhand at creative reuse centers or I purchase felt made from recycled soda bottles – that brand is called Eco-Fi.
- Cotton fabric approximately 3 1/2 inches by 9 inches
- Stabilizing fabric (I used denim) approximately 1 1/4 inches by up to 9 inches
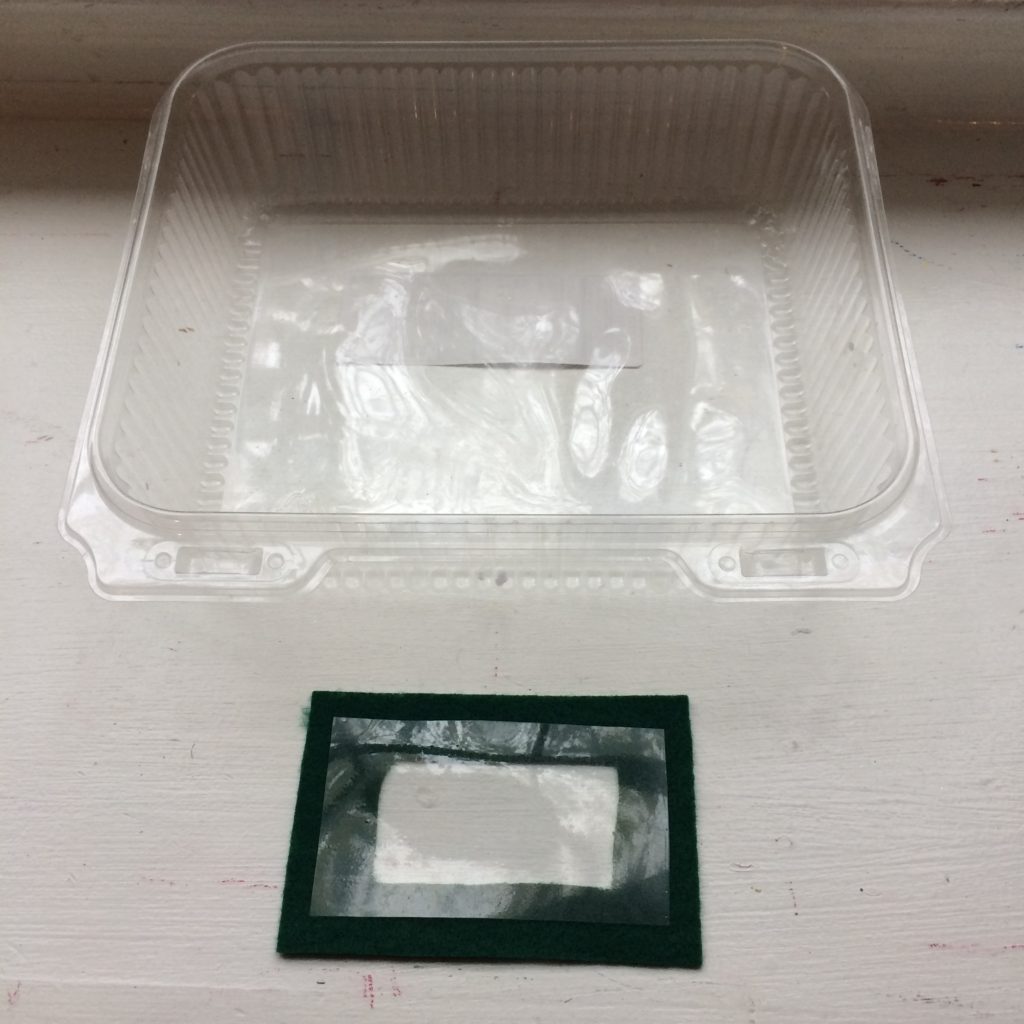
- Clear plastic container like those used for baked goods
- Sewing machine with button-hole making attachment
- Matching thread
- Optional – items to decorate the tag such as felt scraps and beads
- Fabric scissors and scissors to cut thin plastic
Reusable Gift Tag Instructions
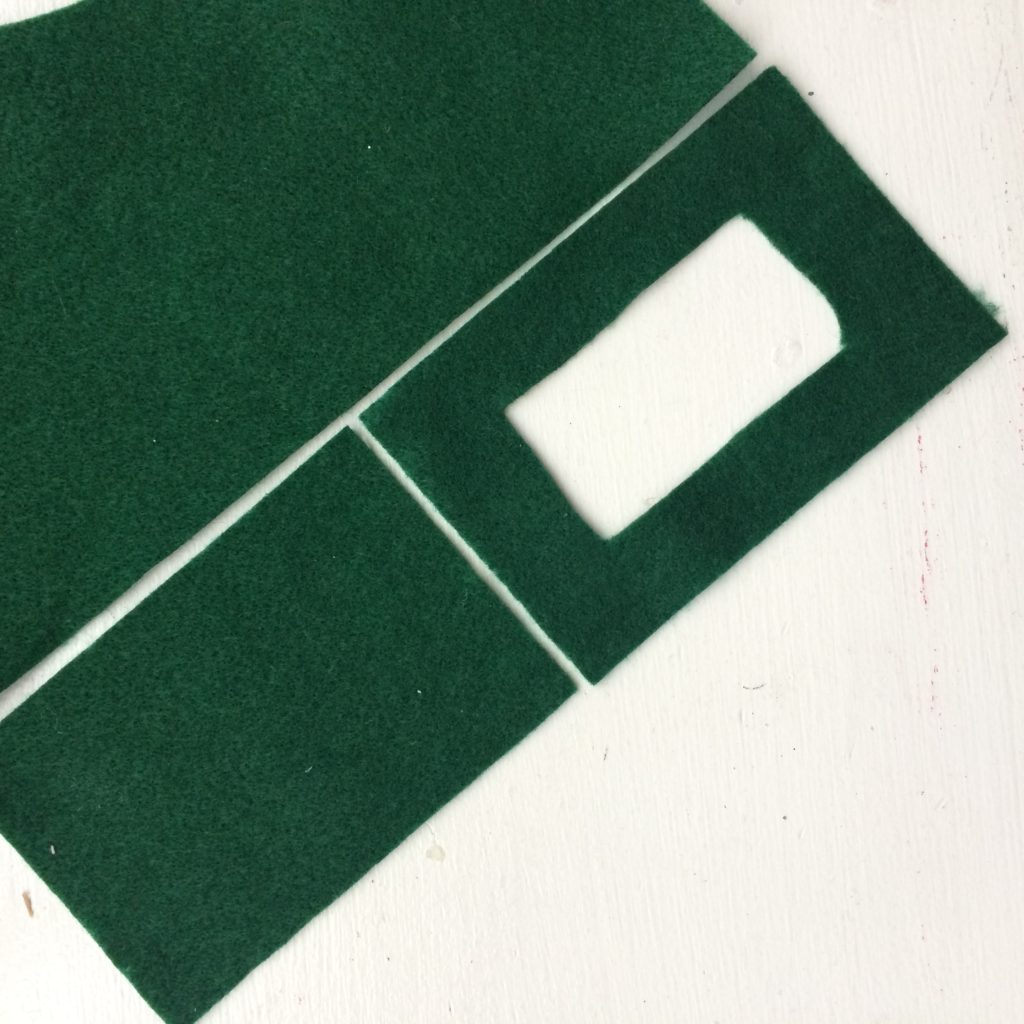
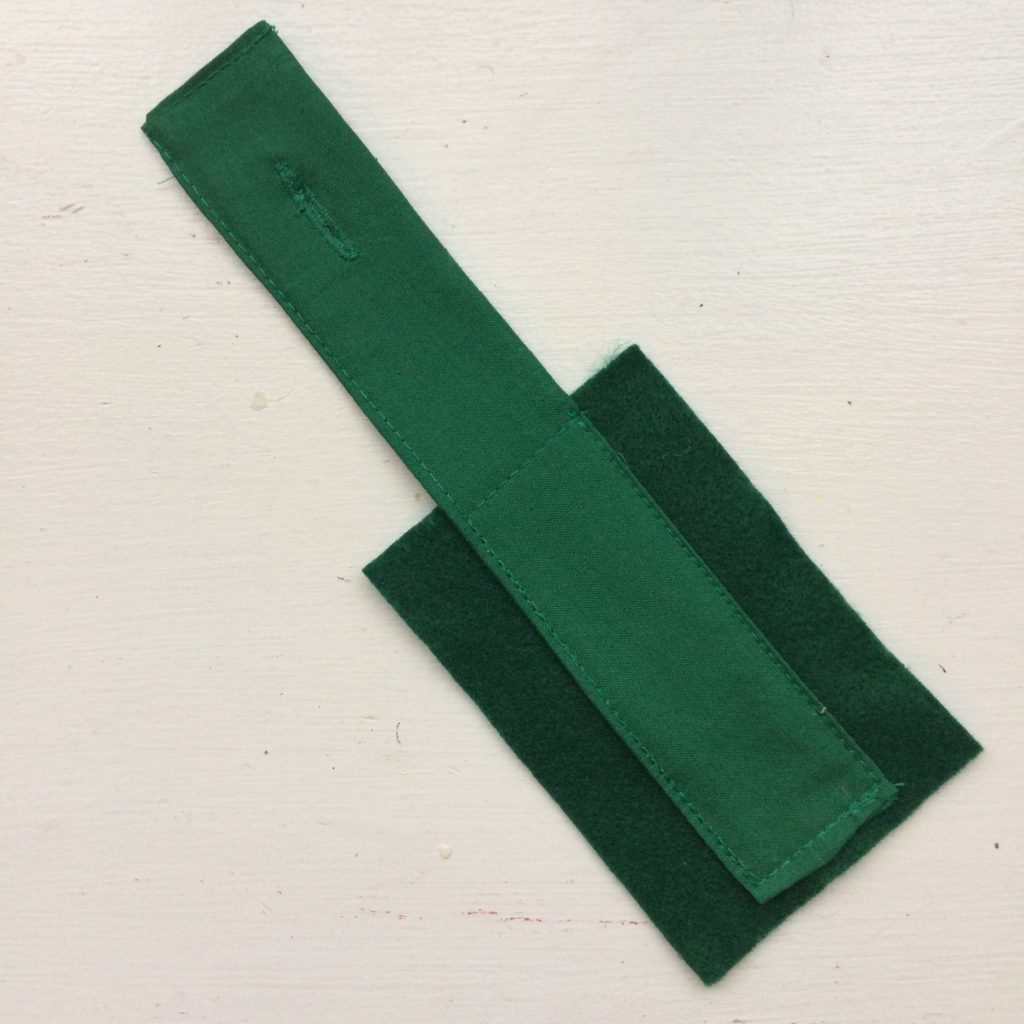
- Cut two felt rectangles – each 3 inches by 4 inches. From one rectangle, cut a window.
2. From clear plastic packaging, cut a window that is 2 1/4 inches by 4 inches. Sew the window to the piece of craft felt with your sewing machine.
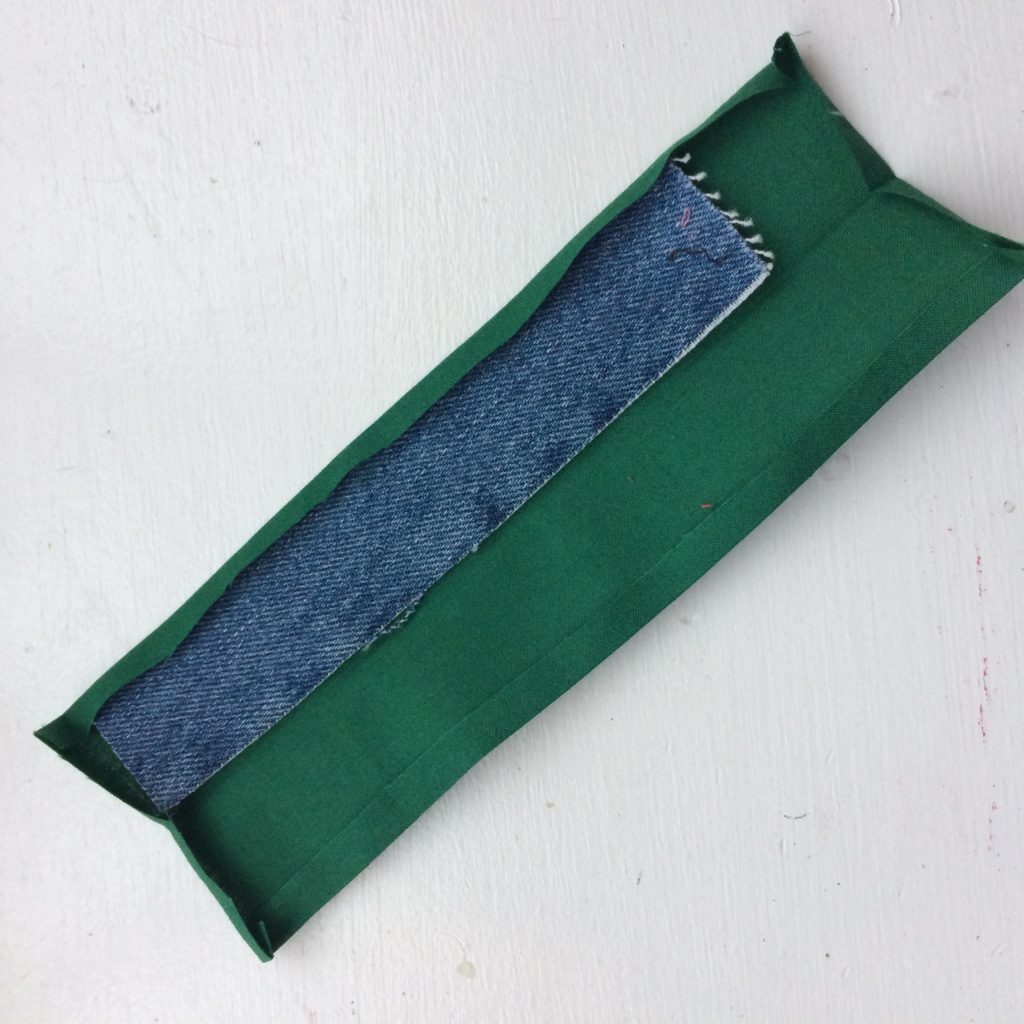
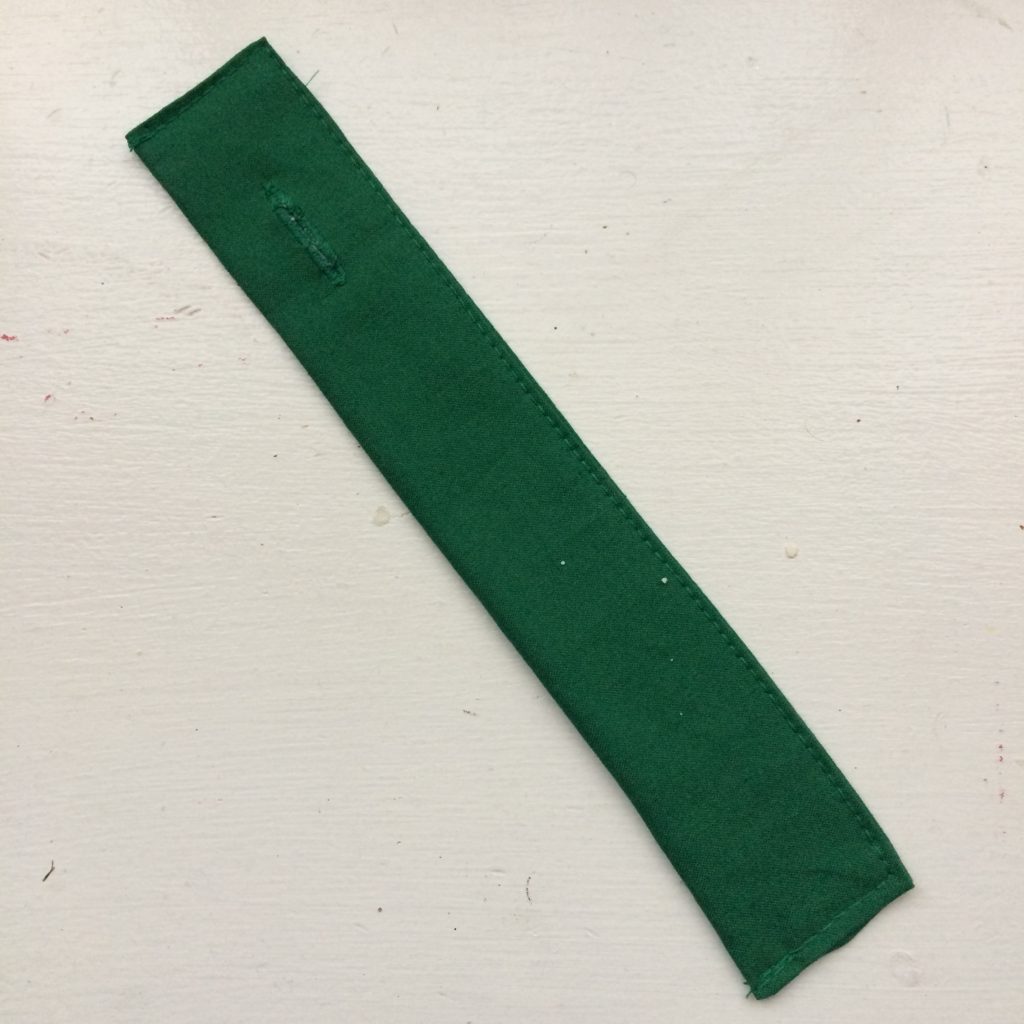
3. To make the handle of the gift tag, cut a piece of cotton 3 1/2 inches by 9 inches. Iron down the edges with a 1/4 inch seam. Fold it in half and iron it in half.
Cut a piece of stabilizing fabric 1 1/4 inches wide. I used a piece of denim. This is important because my sewing machine could not make a button hole on just the cotton. It mashed up the fabric. The denim gave the fabric enough strength to hold a button hole. You might find your fabric works without a stabilizer. Test on a separate piece. Place the stabilizing fabric inside the cotton rectangle.
4. Sew the hang tag in half so it form a rectangle approximately 1 1/4 inches wide and up to 9 inches long. Then add the button hole attachment to your sewing machine and sew a button hole in one end. Each model of sewing machine has its own method for making button holes, so I won’t spend time showing how I did that. Just look in the user manual for your sewing machine. I chose a button hole that was about an inch long, and then I’ll make sure that the buttons I sew on my fabric gift bags fit into that hole.
5. Sew the hang tag on to the back of the reusable gift tag i.e. the rectangle without a window cut in it.
6. Sew on the front of the reusable gift tag but only on three sides. Don’t sew the side facing the hang tag because that’s where you will slide in the paper name card with your “To” and “From” information.
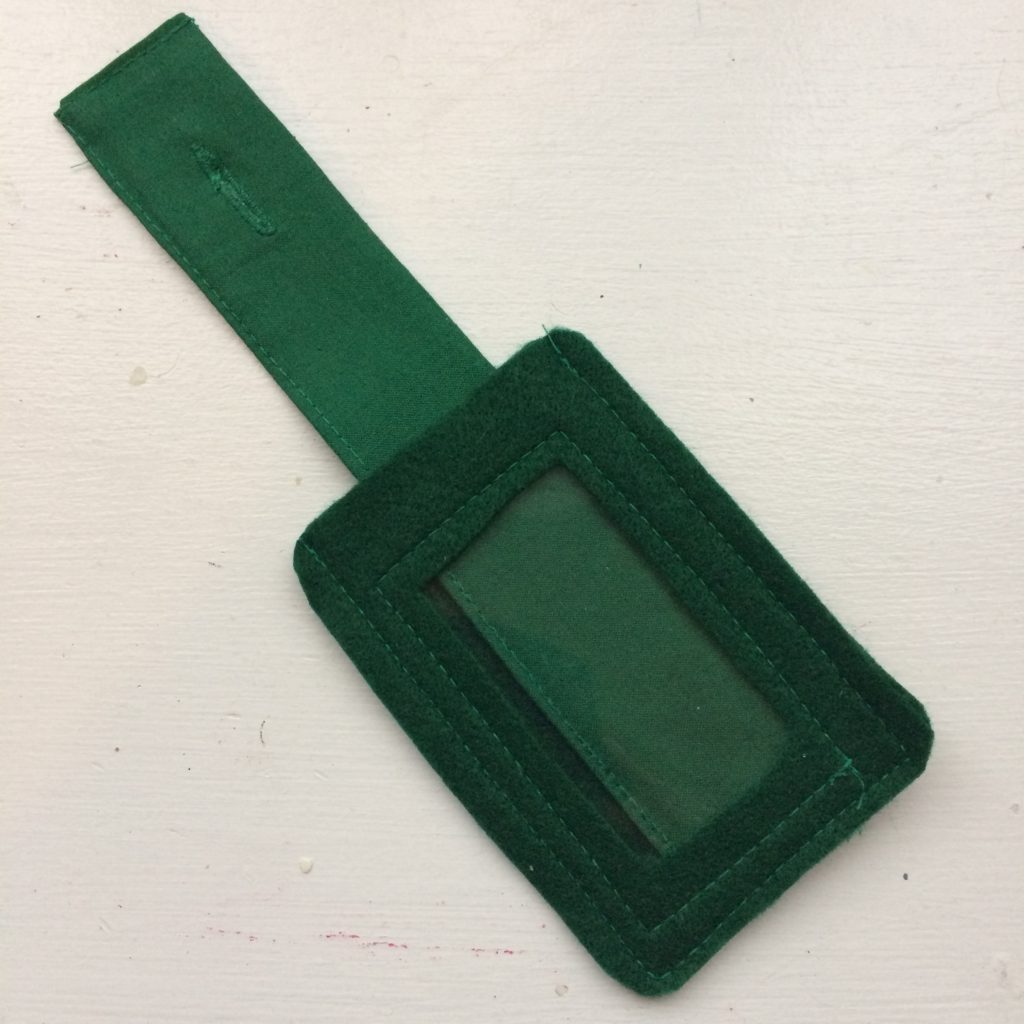
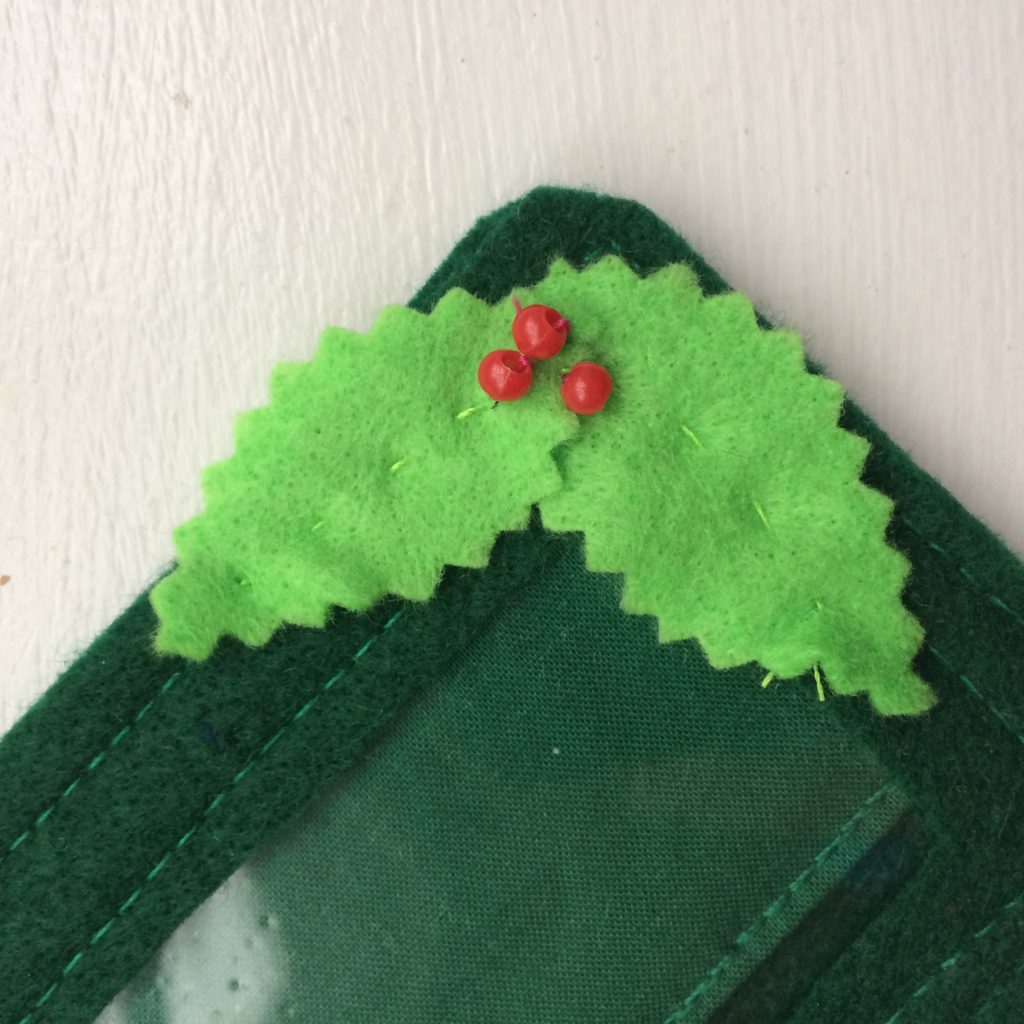
7. Add decorative holly if you’d like. This was made with a lighter green felt cut with pinking shears or scissors with a zigzag edge. Then I added some red beads as berries.
Write your “To” and “From” information on a card that is approximately 3 1/2 inches by 2 inches. This is approximately the size of many business cards, so you could print out the “To” and “From” information using a business card templated document.
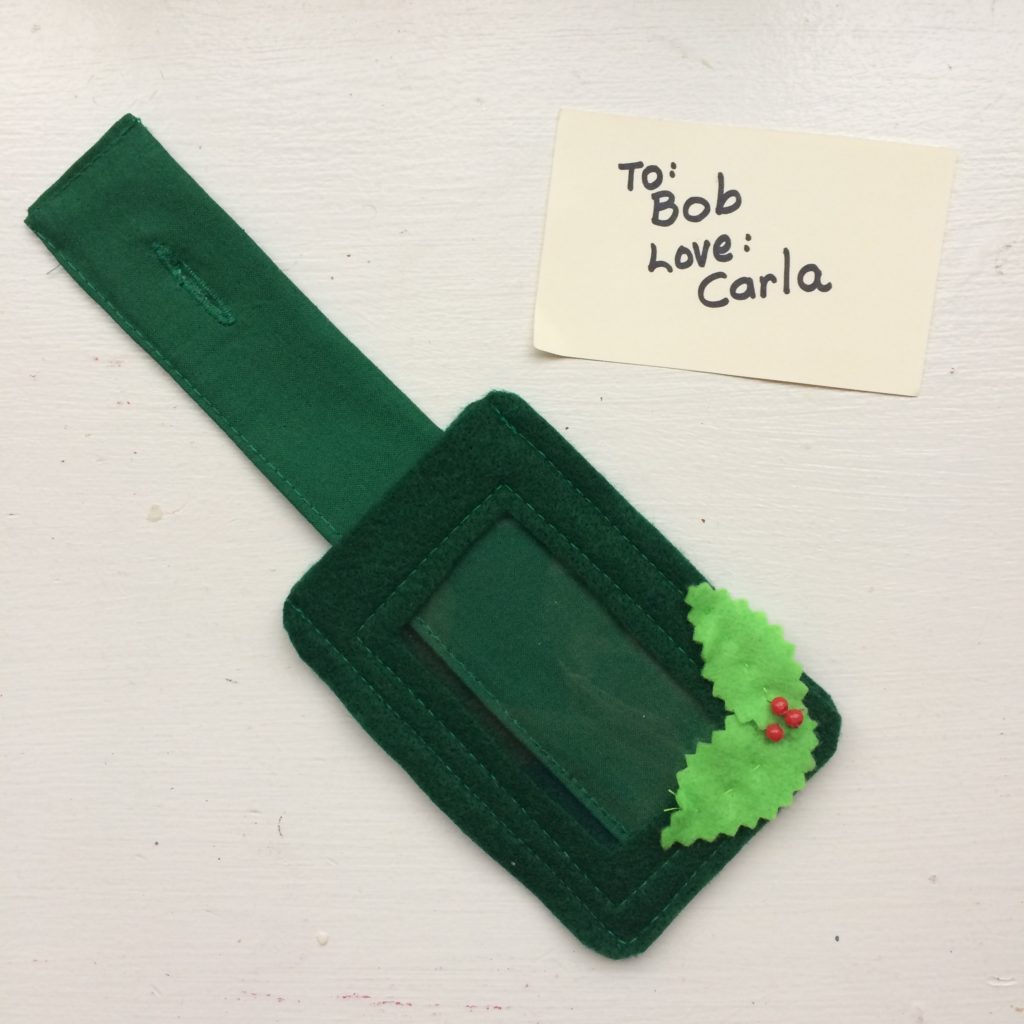
Here’s a close-up of the decorative holly. This was sewn on by hand with just a few stitches down the center of the leaves like a stem.
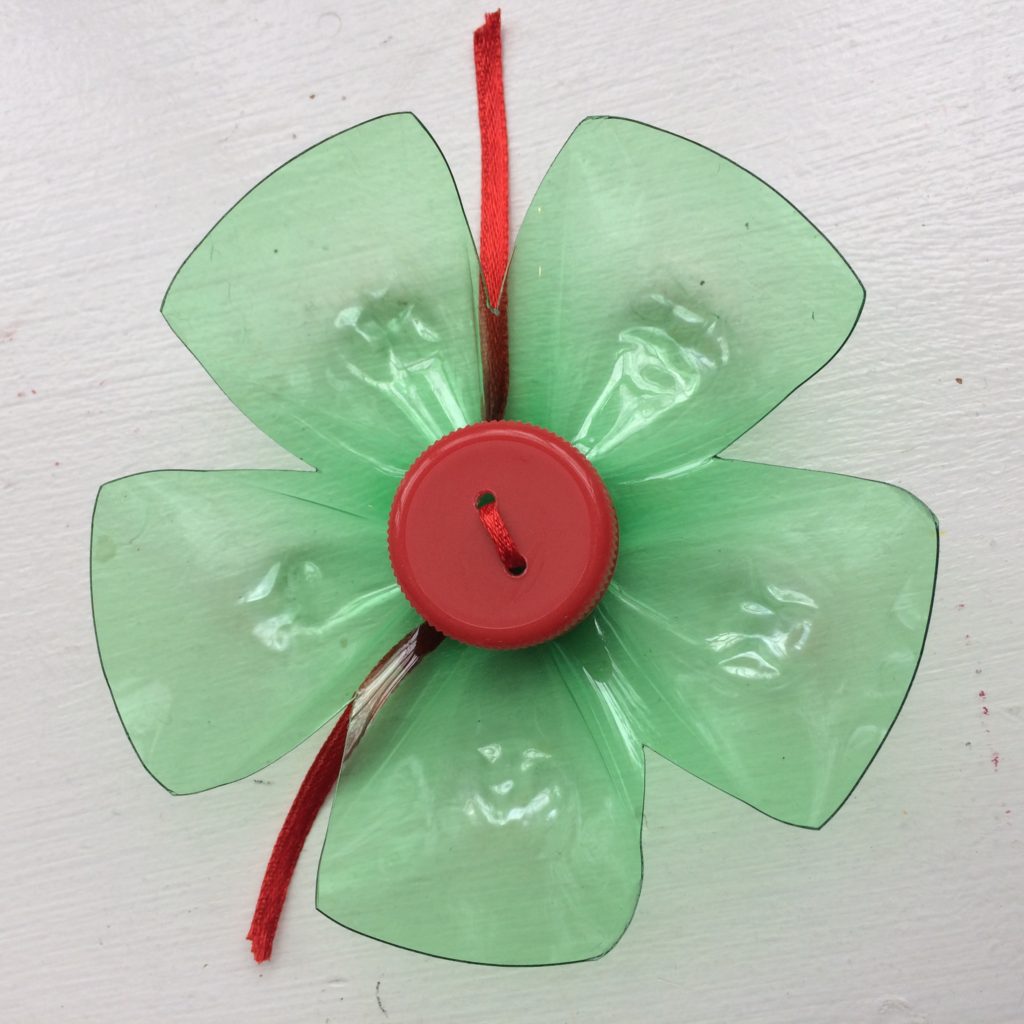
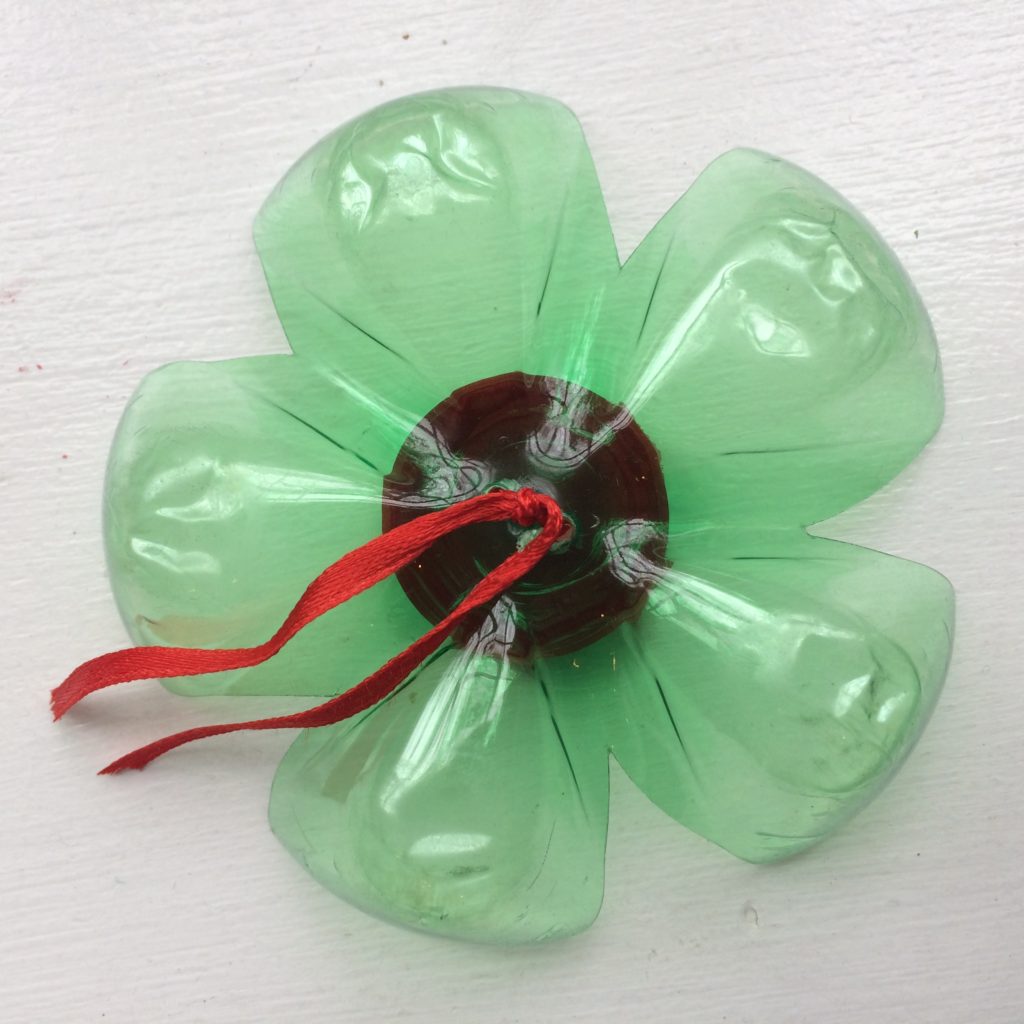
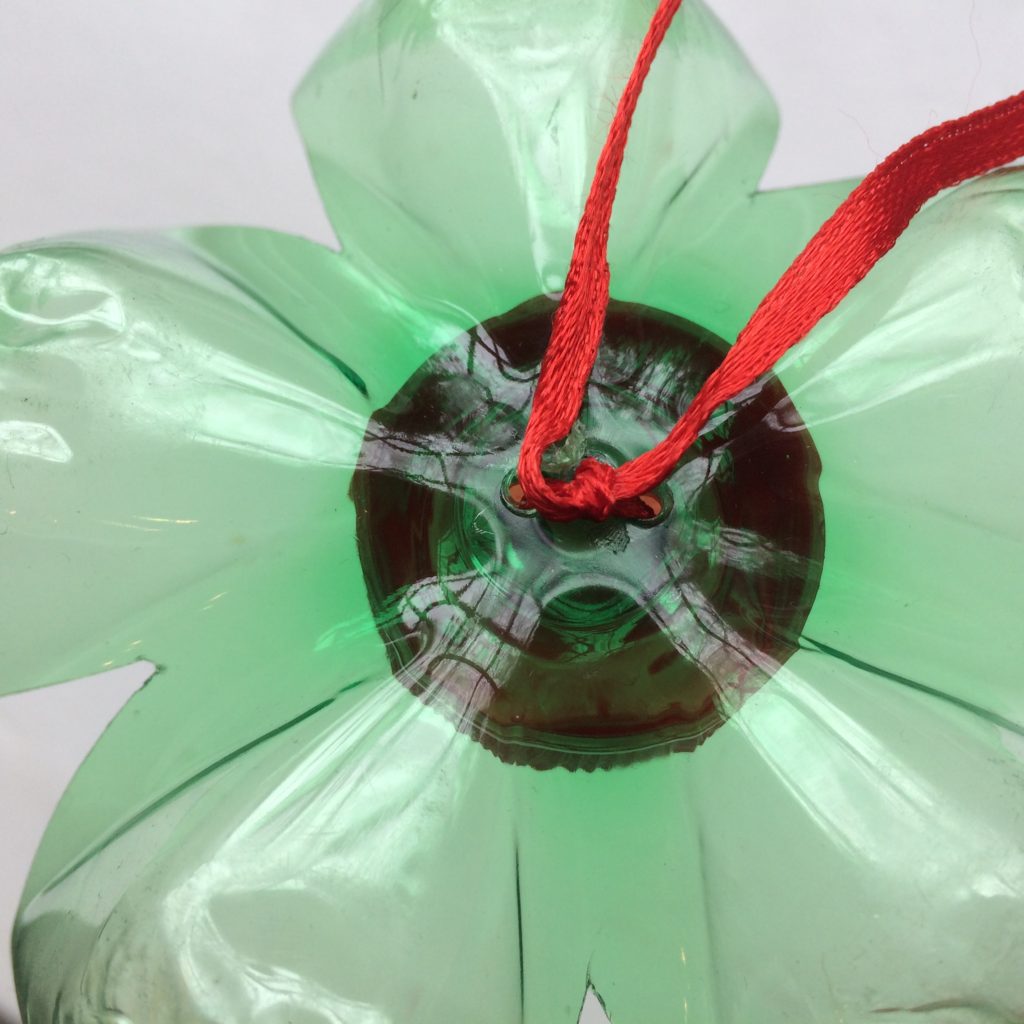
In addition to the decorative gift tag, I also made a “bow” from the bottom of a 2 liter green soda bottle. I cut off the bottom of the bottle and rounded off the leaves like flower petals. I drilled two small holes in the center of that bottle end with my power drill. Then I drilled two matching holes in a red plastic cap. I fed a thin ribbon up from underneath the bottle, through the cap, down into the second hole of the cap and down through the bottle again. I tied a tight knot to keep it together. Then I used the ribbon to tie the bow to the button that was holding the reusable gift tag. Remember to put on the gift tag before the bow.